4. Project deployment and CI/CD
Non-members can read 30% of the article.
In the previous chapter, we ran the local database and the simplest login locally. In this chapter, we started to run the remote deployment and CI/CD.
Main logic of deployment
The main logic for deployment is concentrated in scripts/deploy/index.ts. The entire logic is relatively simple and clear with comments, so there is no need to waste space in the article. Go to Github to view the logic yourself.
/**
 * Main function
 */
const main = async () => {
  try {
    console.log('🚀 Starting deployment process...')

    validateEnvironment()
    setupEnvFile()
    setupWranglerConfigs()
    await checkAndCreateDatabase()
    migrateDatabase()
    // await checkAndCreateKVNamespace()
    await checkAndCreatePages()
    pushPagesSecret()
    deployPages()

    console.log('🎉 Deployment completed successfully')
  } catch (error) {
    console.error('❌ Deployment failed:', error)
    process.exit(1)
  }
}

main()
Environment variable settings
In .env, these environment variables must be obtained from cloudflare.
CLOUDFLARE_ACCOUNT_ID=""
CLOUDFLARE_API_TOKEN=""
PROJECT_NAME=""
DATABASE_NAME=""
DATABASE_ID=""
The process is as follows:
- Log in to Cloudflare console
- Get the ID from the URL. When you log in, your URL will look like this: https://dash.cloudflare.com/[acoutId]/home/domains. The middle part is your
CLOUDFLARE_ACCOUNT_ID. Of course, there are other places to look, but this is the fastest. - As shown in the figure, click the little man on the right -> drop-down box -> configuration file -> api token -> create token
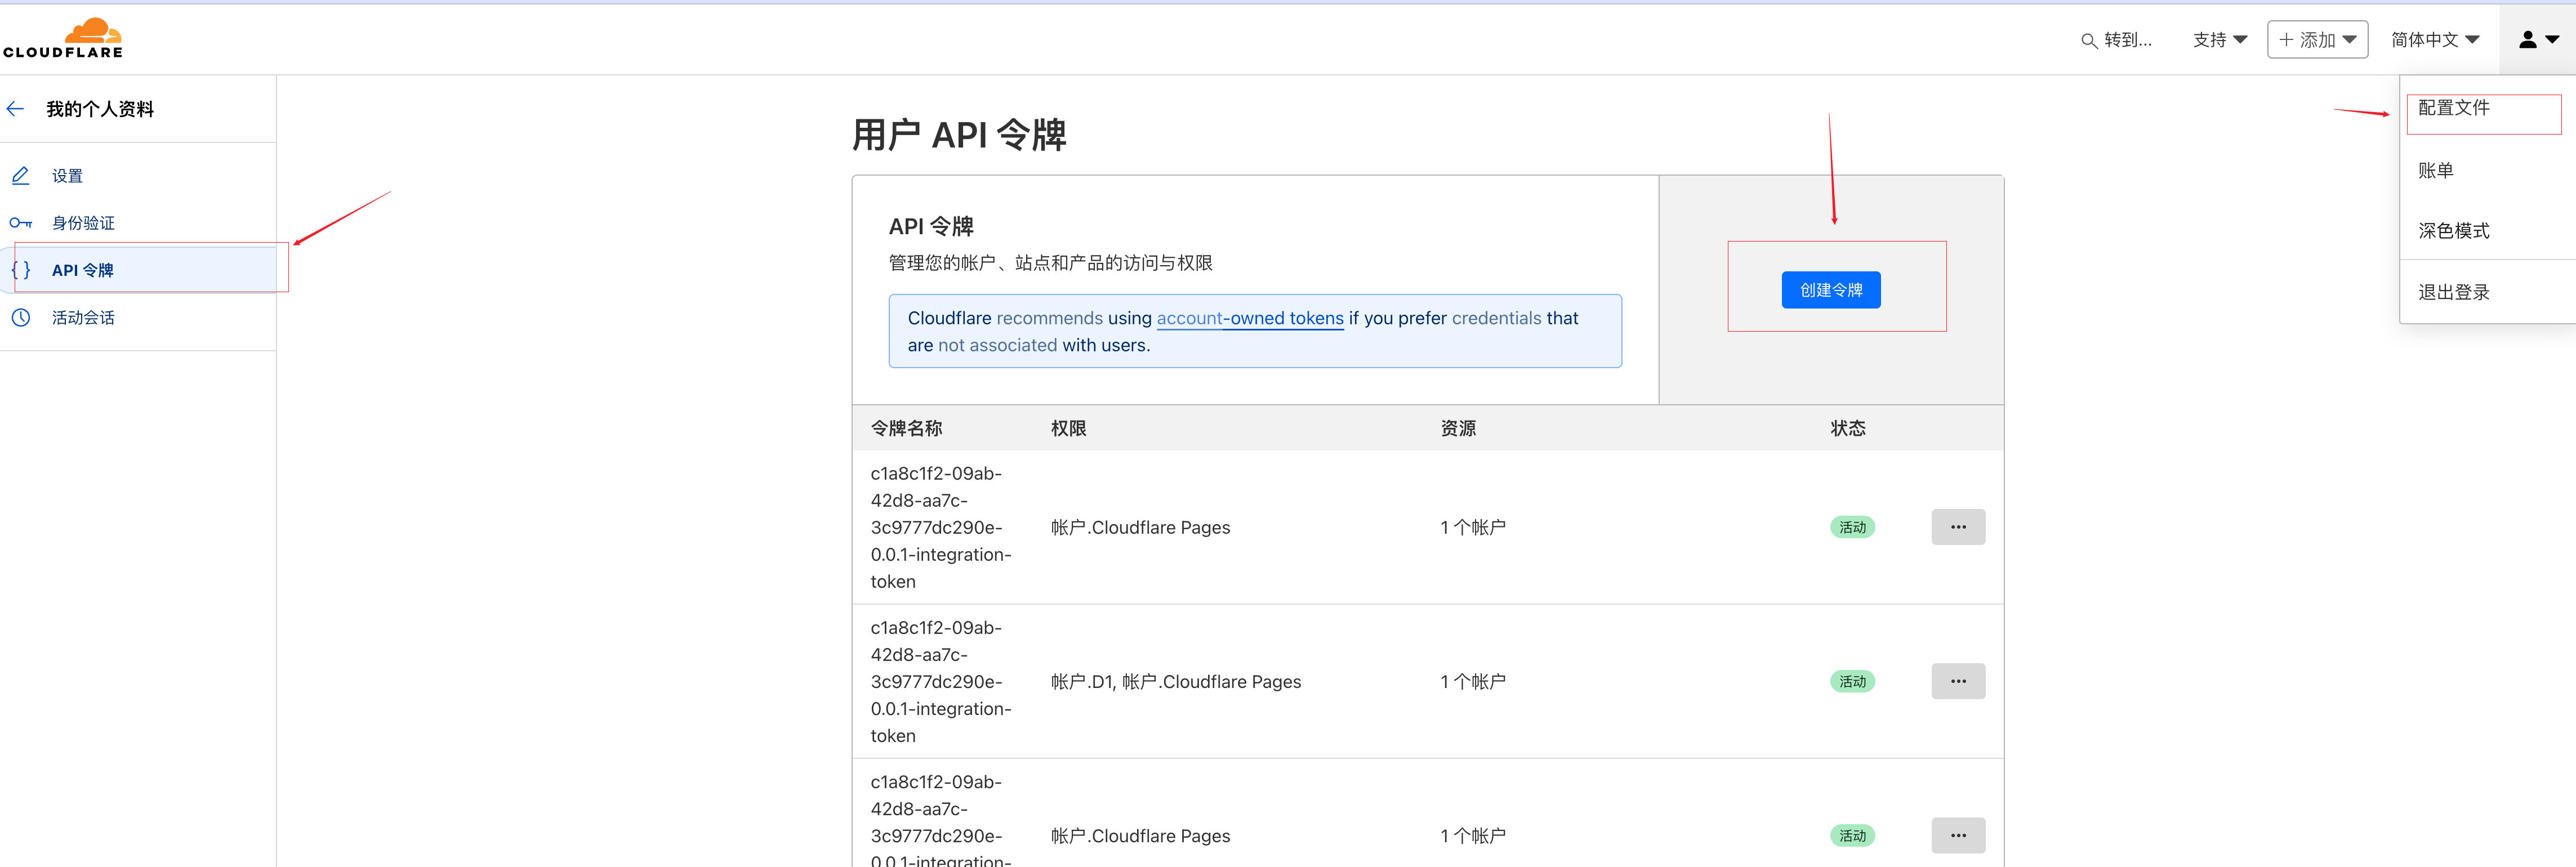
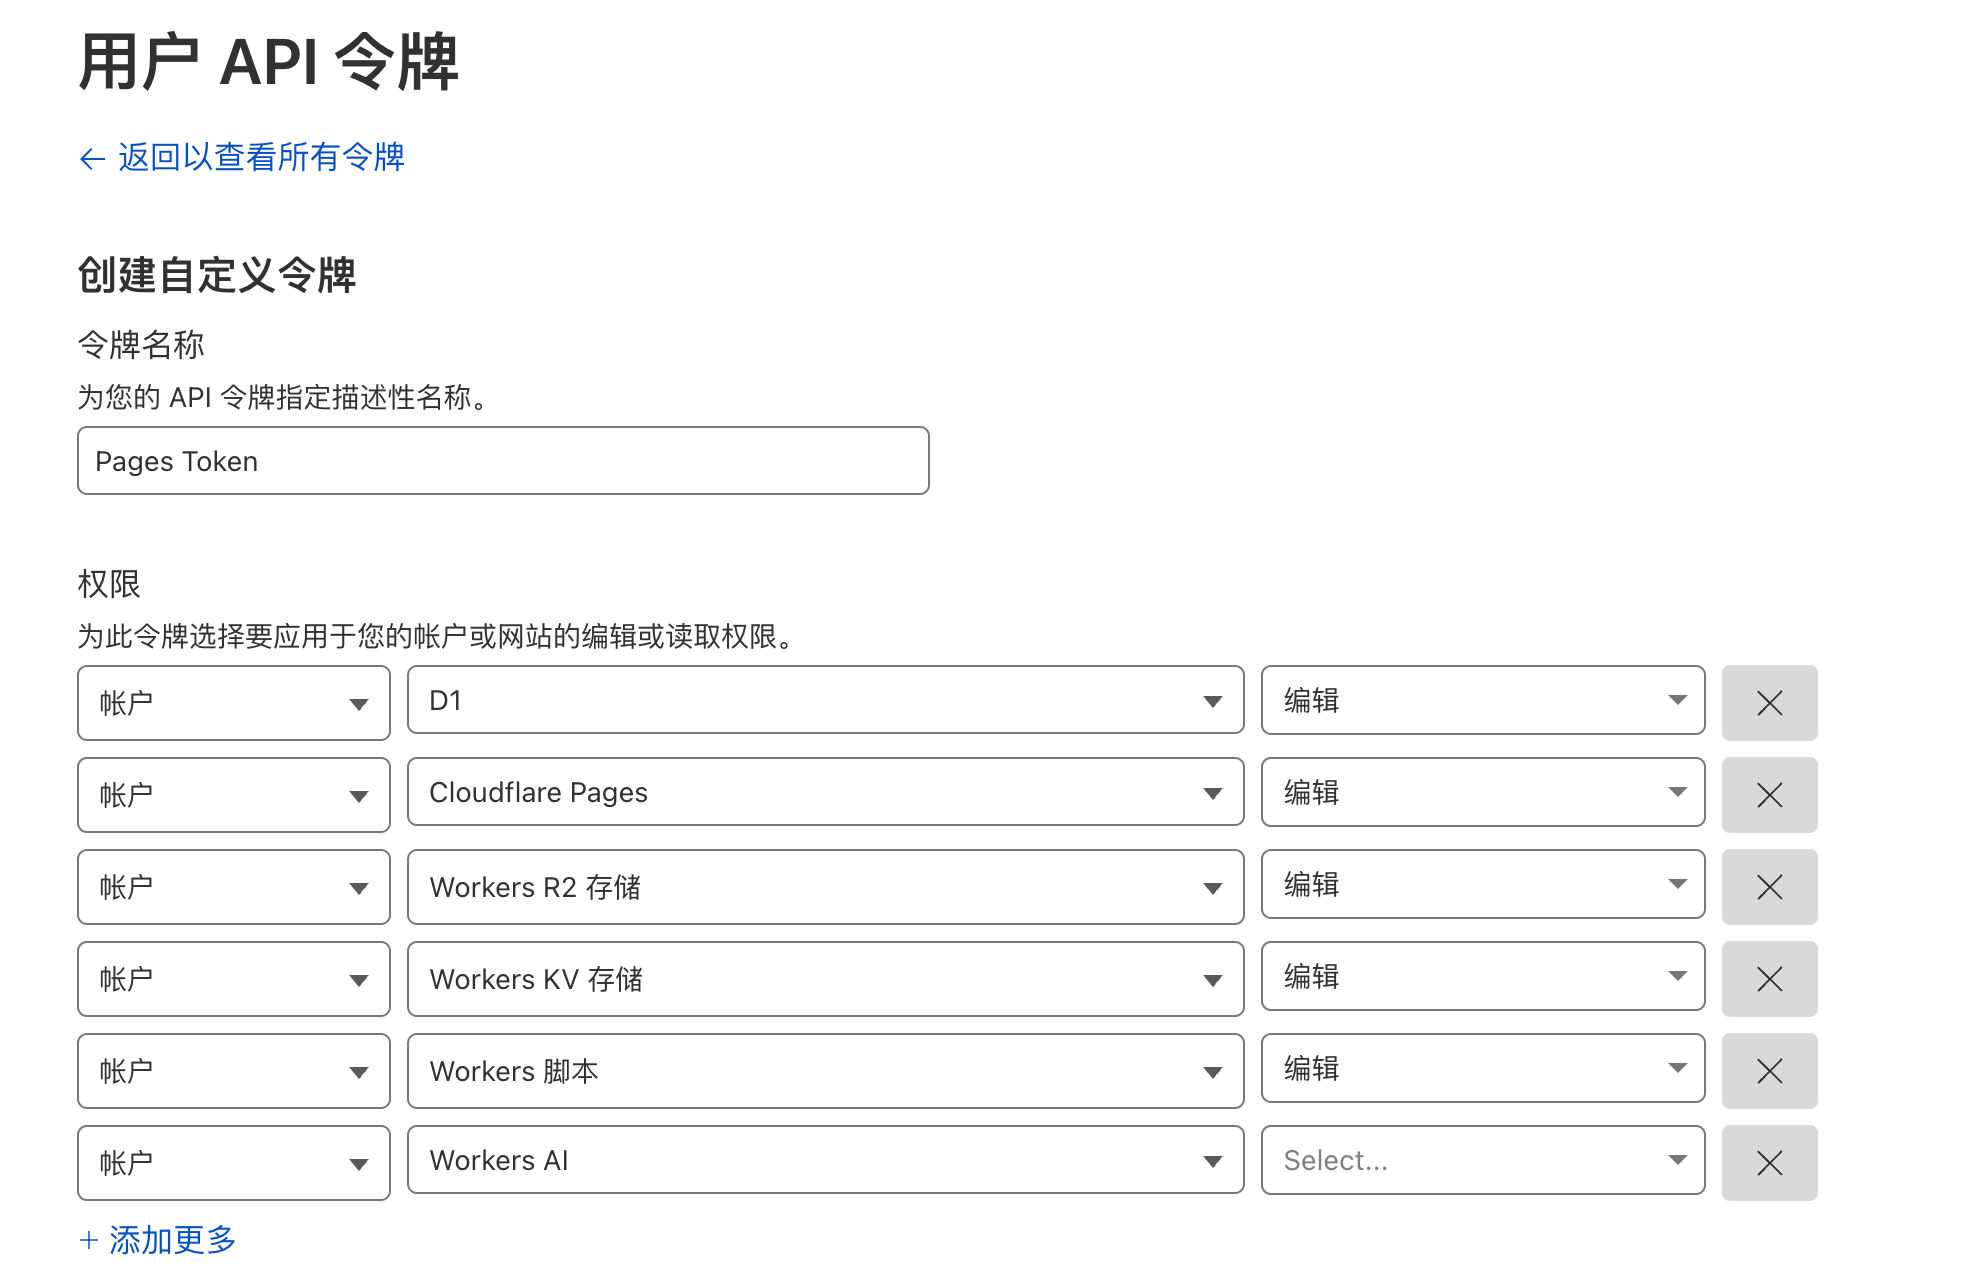
Then select these permissions (you can select more such as R2 bucket, Quest queue, and AI to avoid adding them later). After the creation is successful, you will get a secret key. Remember to save it. There is only one chance to view it. Fill it in CLOUDFLARE_API_TOKEN.
PROJECT_NAMEtakes the name you want for a projectDATABASE_NAMEandDATABASE_ID, fill in the value of d1 generated locally in the previous section.
Pay attention to
PROJECT_NAME. This is where I stepped into a trap when writing this article. When I was running CI, I always thought there was a problem with the environment variable settings of my github. Until I went through the source code of cloudflare, the requirements are as follows: The project name can be 1-58 lowercase characters and can contain hyphens, but cannot start or end with a hyphen, for example:cloudflare-next-template.
Execute the deployment script and verify the results
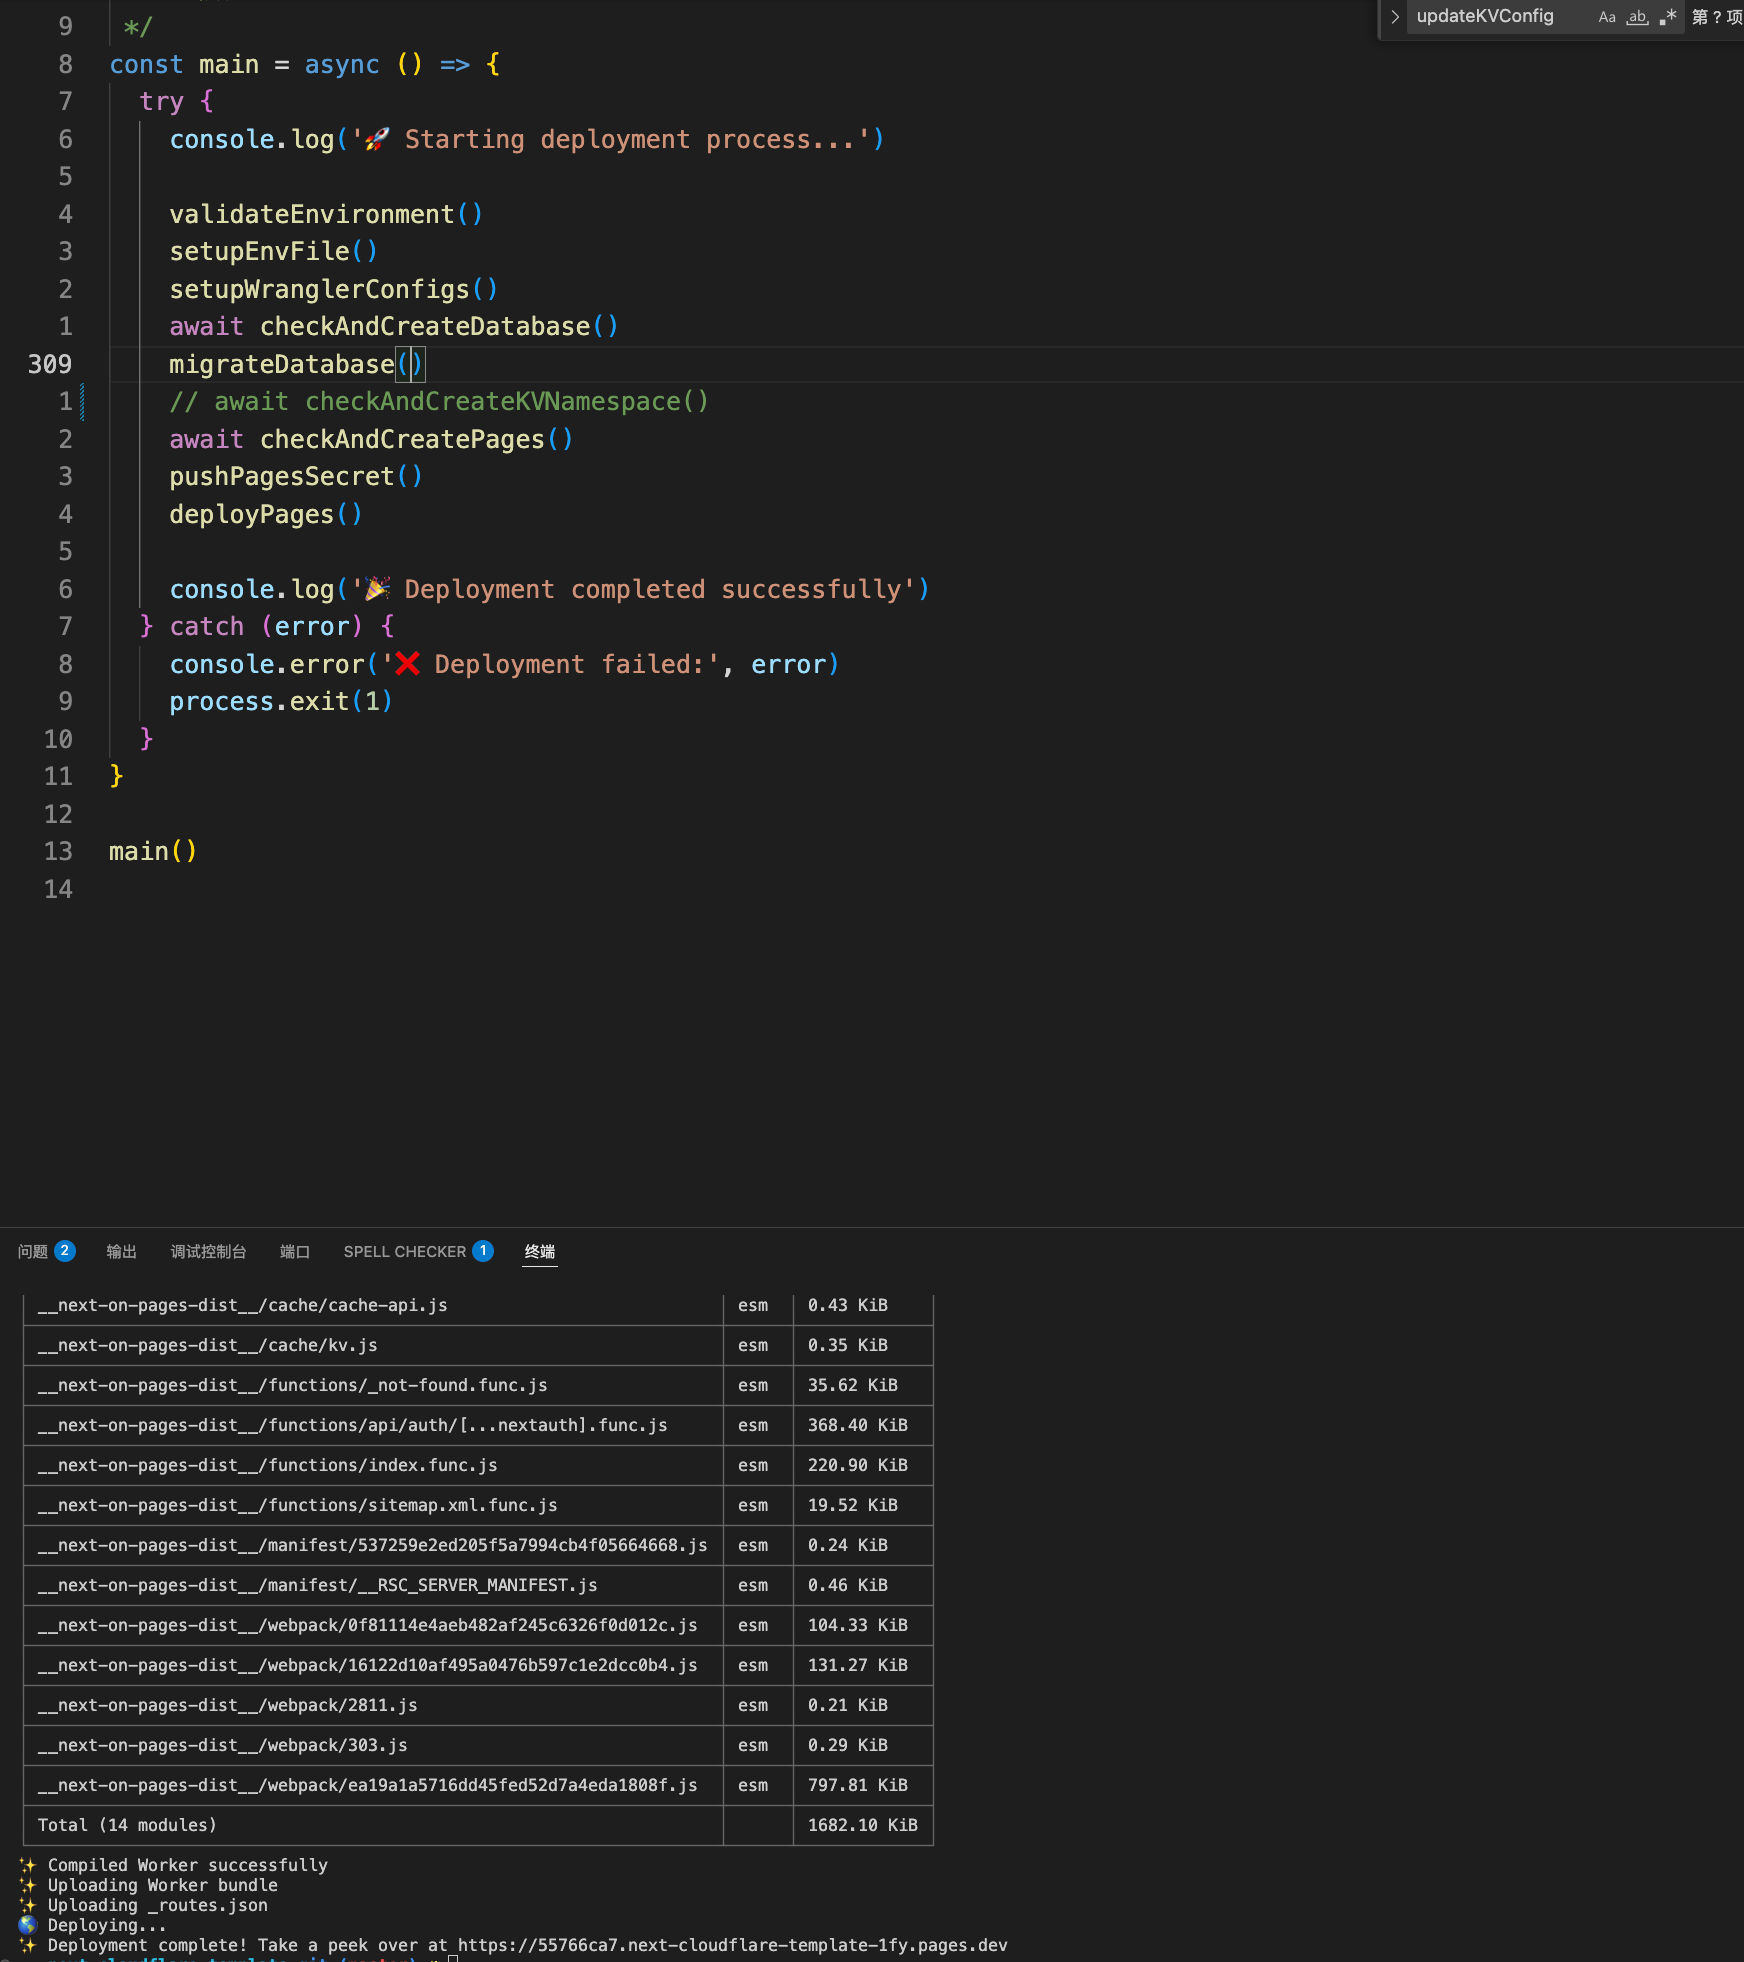
pnpm deploy:pages is executed, as shown in the figure.
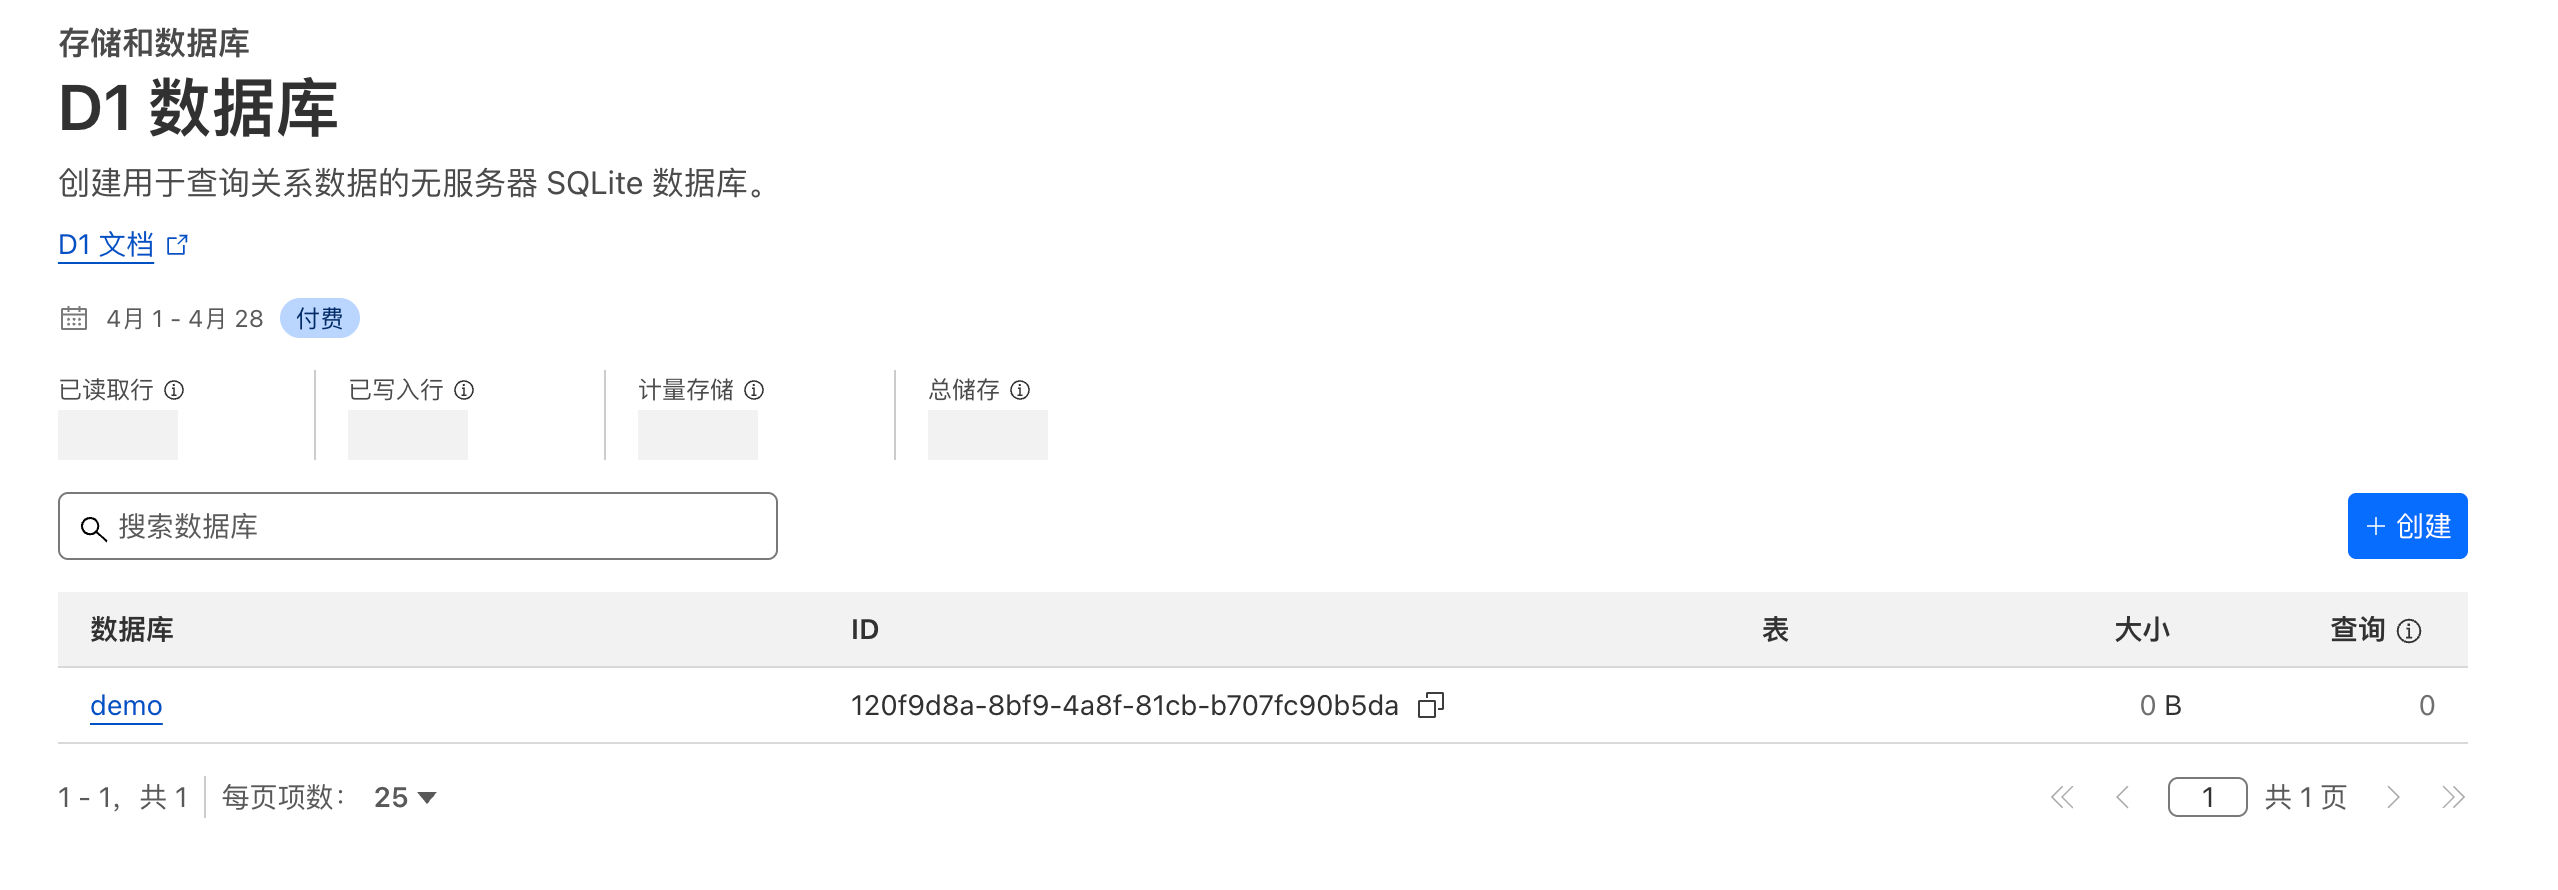
Check it on cloudflare. The location is Workers and D1. Enter from the left sidebar:
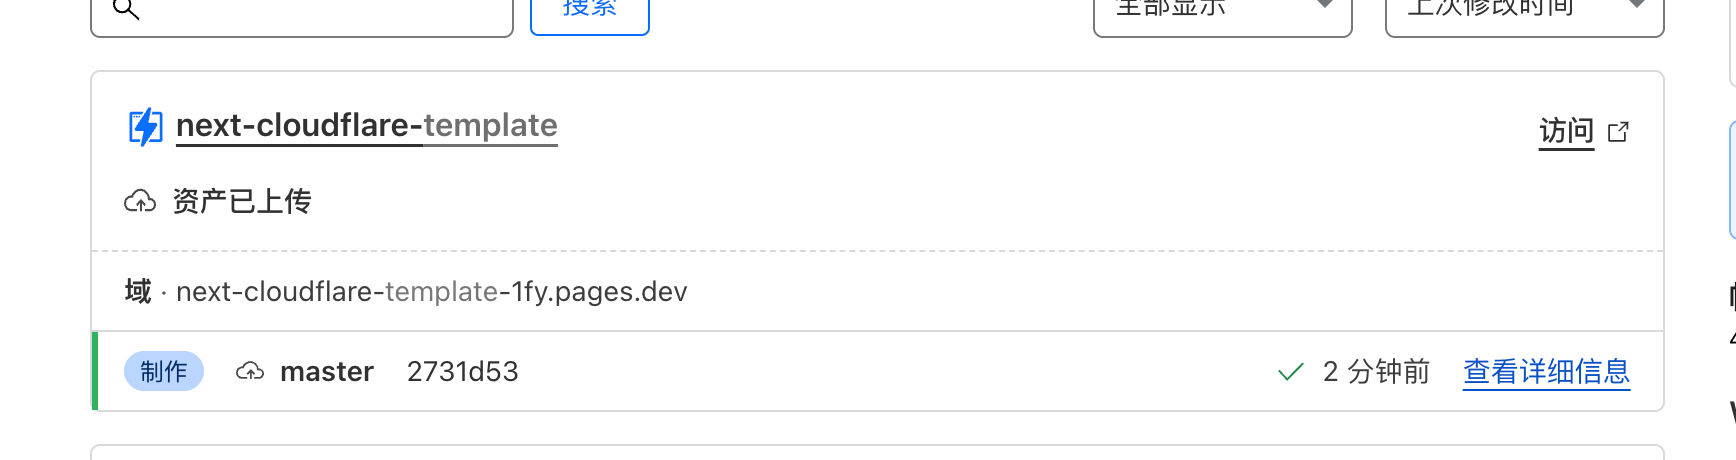
Finally, I hung this Workers under one of my second-level domain names (you can directly enter the domain you own here, but the domain must be on cloudflare, and cloudflare will automatically handle it for you).
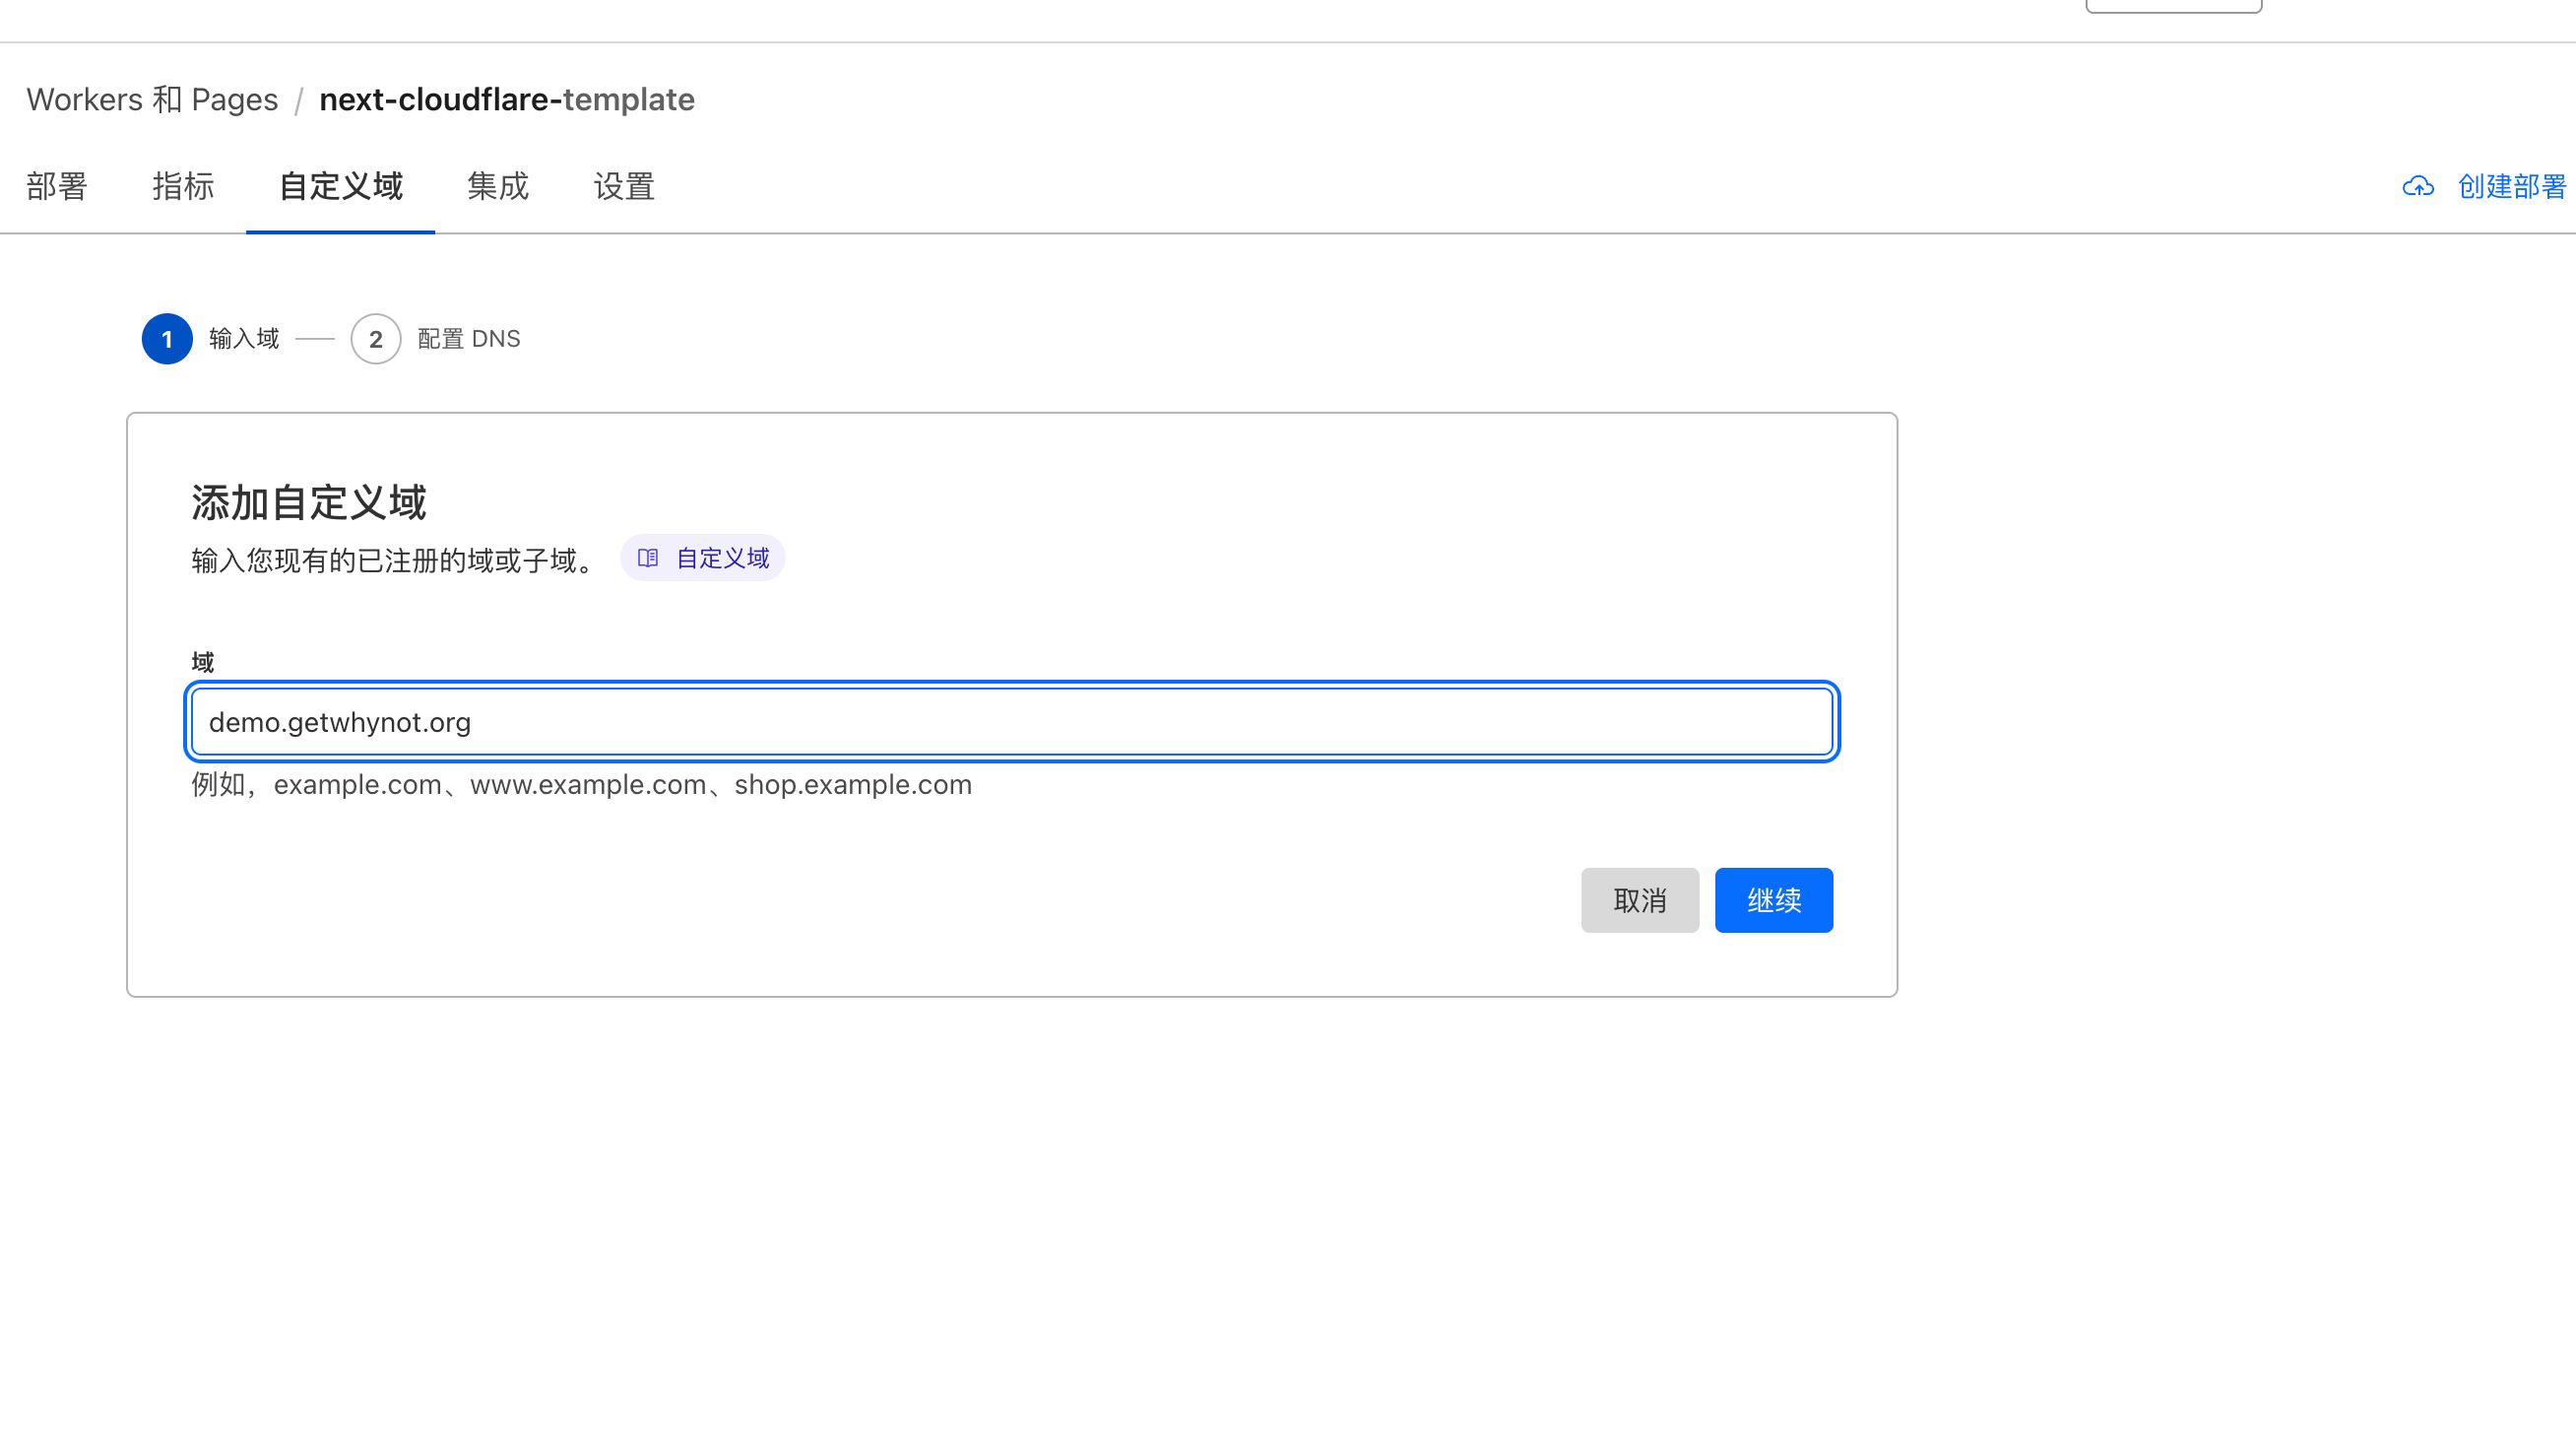
Visit address: https://demo.getwhynot.org/
Migrate the database to remote D1
Obviously we still have something to do, which is to migrate the local database to the remote D1. Because there are already migrations locally, we only need to execute wrangler d1 migrations apply demo --remote to synchronize the database to the remote D1.
Subscribe to unlock the full article
Support the writing, unlock every paragraph, and receive future updates instantly.
Comments
Join the conversation
No comments yet. Be the first to add one.