Obviously, the best way to start a project is to find a template directly on github and start modifying it directly. We must consider the previous technology selection, the most critical areas are database and deployment.
What's sad is that I searched around and found no project that meets the requirements. I have no choice but to come up with one for everyone. The project address is: https://github.com/Shiinama/next-cloudflare-template
Next, everyone will follow me. The main purpose of this chapter is to run the project and the local database, talk about the infrastructure, and run through the local process through the most commonly used Google login.
Basic background knowledge is supplemented in:
Log in to wrangler
Before we can start using Cloudflare Workers and the D1 database, we need to log into the Wrangler CLI tool. Wrangler is a command line tool officially provided by Cloudflare for developing, testing, and deploying Cloudflare Workers.
1. Install Wrangler
If you don't have Wrangler installed yet, you can install it via npm:
npm install -g wrangler
Or use pnpm in your project:
pnpm add -D wrangler
2. Log in to your Cloudflare account
After the installation is complete, you need to log in to your Cloudflare account:
pnpm wrangler login
After executing this command, a browser window will open prompting you to log in to your Cloudflare account and authorize Wrangler access. Follow the prompts to complete the authorization process.
3. Verify login status
After successful login, you can verify the login status:
pnpm wrangler whoami
This command will display the Cloudflare account information you are currently logged in to, including email and account ID.
Now that you have successfully logged into Wrangler, you can start creating and managing Cloudflare resources.
Create Cloudflare database
We need to create a local D1 database first:
pnpm wrangler d1 create demo
This command will create a D1 database named "demo". After execution, you will see some configuration information, which needs to be replaced with the corresponding information in our wrangler.toml file.
Like this:
{
  "d1_databases": [
    {
      "binding": "DB",
      "database_name": "demo",
      "database_id": "faac1a9d-d012-4e93-b30f-ba990b24928e"
    }
  ]
}
Use this command to check whether the creation is successful or not
pnpm wrangler d1 list
Don’t use mine, there’s no point in logging in if you don’t use my account.
2. Initialize database structure
We manage the D1 database through Drizzle.
So we need to configure lib/db/schema.ts. In the project, I have already configured it directly. The reference is the sqlite database structure configuration under next auth drizzle.
drizzle.config.ts is written directly. Directly execute pnpm drizzle-kit generate (generate SQL migration file), and the SQL is generated in the migrations folder, like this.
CREATE TABLE `account` (
	`userId` text NOT NULL,
	`type` text NOT NULL,
	`provider` text NOT NULL,
	`providerAccountId` text NOT NULL,
	`refresh_token` text,
	`access_token` text,
	`expires_at` integer,
	`token_type` text,
	`scope` text,
	`id_token` text,
	`session_state` text,
	PRIMARY KEY(`provider`, `providerAccountId`),
	FOREIGN KEY (`userId`) REFERENCES `user`(`id`) ON UPDATE no action ON DELETE cascade
);
--> statement-breakpoint
CREATE TABLE `authenticator` (
	`credentialID` text NOT NULL,
	`userId` text NOT NULL,
	`providerAccountId` text NOT NULL,
	`credentialPublicKey` text NOT NULL,
	`counter` integer NOT NULL,
	`credentialDeviceType` text NOT NULL,
	`credentialBackedUp` integer NOT NULL,
	`transports` text,
	PRIMARY KEY(`userId`, `credentialID`),
	FOREIGN KEY (`userId`) REFERENCES `user`(`id`) ON UPDATE no action ON DELETE cascade
);
--> statement-breakpoint
CREATE UNIQUE INDEX `authenticator_credentialID_unique` ON `authenticator` (`credentialID`);--> statement-breakpoint
CREATE TABLE `session` (
	`sessionToken` text PRIMARY KEY NOT NULL,
	`userId` text NOT NULL,
	`expires` integer NOT NULL,
	FOREIGN KEY (`userId`) REFERENCES `user`(`id`) ON UPDATE no action ON DELETE cascade
);
--> statement-breakpoint
CREATE TABLE `user` (
	`id` text PRIMARY KEY NOT NULL,
	`name` text,
	`email` text,
	`emailVerified` integer,
	`image` text
);
--> statement-breakpoint
CREATE UNIQUE INDEX `user_email_unique` ON `user` (`email`);--> statement-breakpoint
CREATE TABLE `verificationToken` (
	`identifier` text NOT NULL,
	`token` text NOT NULL,
	`expires` integer NOT NULL,
	PRIMARY KEY(`identifier`, `token`)
);
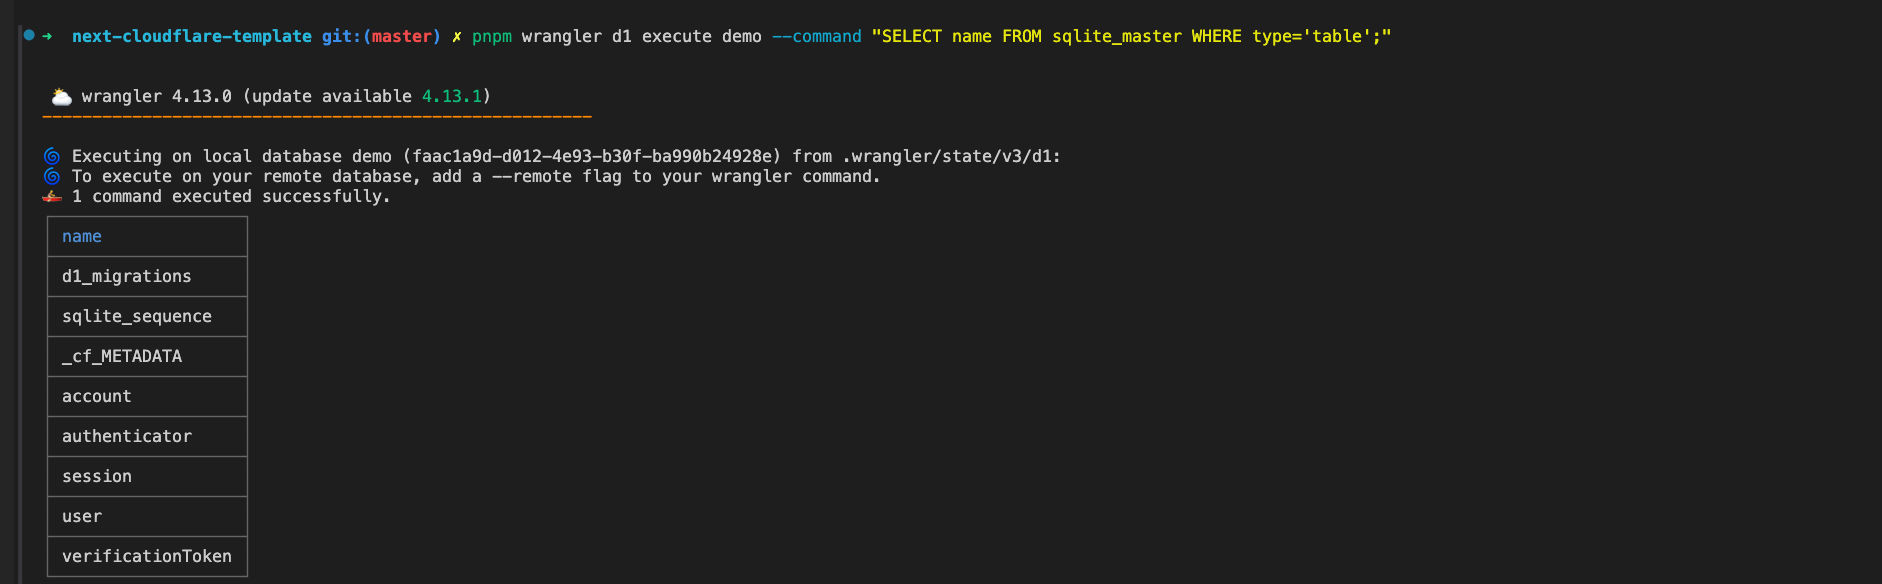
Then we execute the D1 database migration command pnpm wrangler d1 migrations apply demo --local. After the migration is successful, execute pnpm wrangler d1 execute demo --command "SELECT name FROM sqlite_master WHERE type='table';". At this time, you can see that the local table has been successfully created.
What needs to be understood is: We use
drizzleto generate migration SQL files, code layer database management, and finally synchronize the structure to the real database through the migration script of D1.
Finally we create a function:
// lib/db/index.ts
import { getRequestContext } from '@cloudflare/next-on-pages'
import { drizzle } from 'drizzle-orm/d1'

import * as schema from './schema'

export const createDb = () => drizzle(getRequestContext().env.DB, { schema })

export type Db = ReturnType<typeof createDb>
getRequestContext is a method to obtain variables in the ServerLess environment. We can directly operate the database through createDb in subsequent uses.
After completing the previous database configuration, we need to verify whether the database is really available. Let's go directly to Google's login flow to see if data is inserted into the table normally.
3. Configure Next Auth
First come to lib/auth.ts. Here we first focus on AUTH_SECRET. We can directly use npm exec auth secret, which will automatically create AUTH_SECRET into .env.local. This is the capability provided by NextAuth's scaffolding. (You can also use openssl rand -base64 32 directly).
The DrizzleAdapter is a middle layer, which actually handles various table and SQL operations.
providers: [Google] means that we have introduced Google as a login provider.
import { DrizzleAdapter } from '@auth/drizzle-adapter'

import NextAuth from 'next-auth'
import Google from 'next-auth/providers/google'

import { accounts, sessions, users, verificationTokens } from './db/schema'
import { createDb } from '@/lib/db'

export const { handlers, signIn, signOut, auth } = NextAuth(() => {
  const db = createDb()

  return {
    secret: process.env.AUTH_SECRET,
    adapter: DrizzleAdapter(db, {
      usersTable: users,
      accountsTable: accounts,
      sessionsTable: sessions,
      verificationTokensTable: verificationTokens
    }),
    providers: [Google],
    session: {
      strategy: 'jwt'
    }
  }
})
4. Configure Google login
Most parts of configuring Google Cloud involve filling in information. There are many online tutorials:
https://developers.google.com/identity/protocols/oauth2?hl=zh-cn
https://console.cloud.google.com/
After registering the account and application, click API and Service -> Oauth Permission Page -> Client -> Create Client, and you will come to the place to create the application. The filling method is as shown in the figure.
- Application name: Will be displayed when logging in with someone else's Google account
- Callback address: http://localhost:3000/api/auth/callback/google (local development environment)
- Authorized JavaScript source: http://localhost:3000
In a production environment, you need to change the callback address to your actual domain name, for example: https://yourdomain.com/api/auth/callback/google
This callback address is very important, it must exactly match the callback URL in the NextAuth configuration, otherwise Google will reject the authentication request.
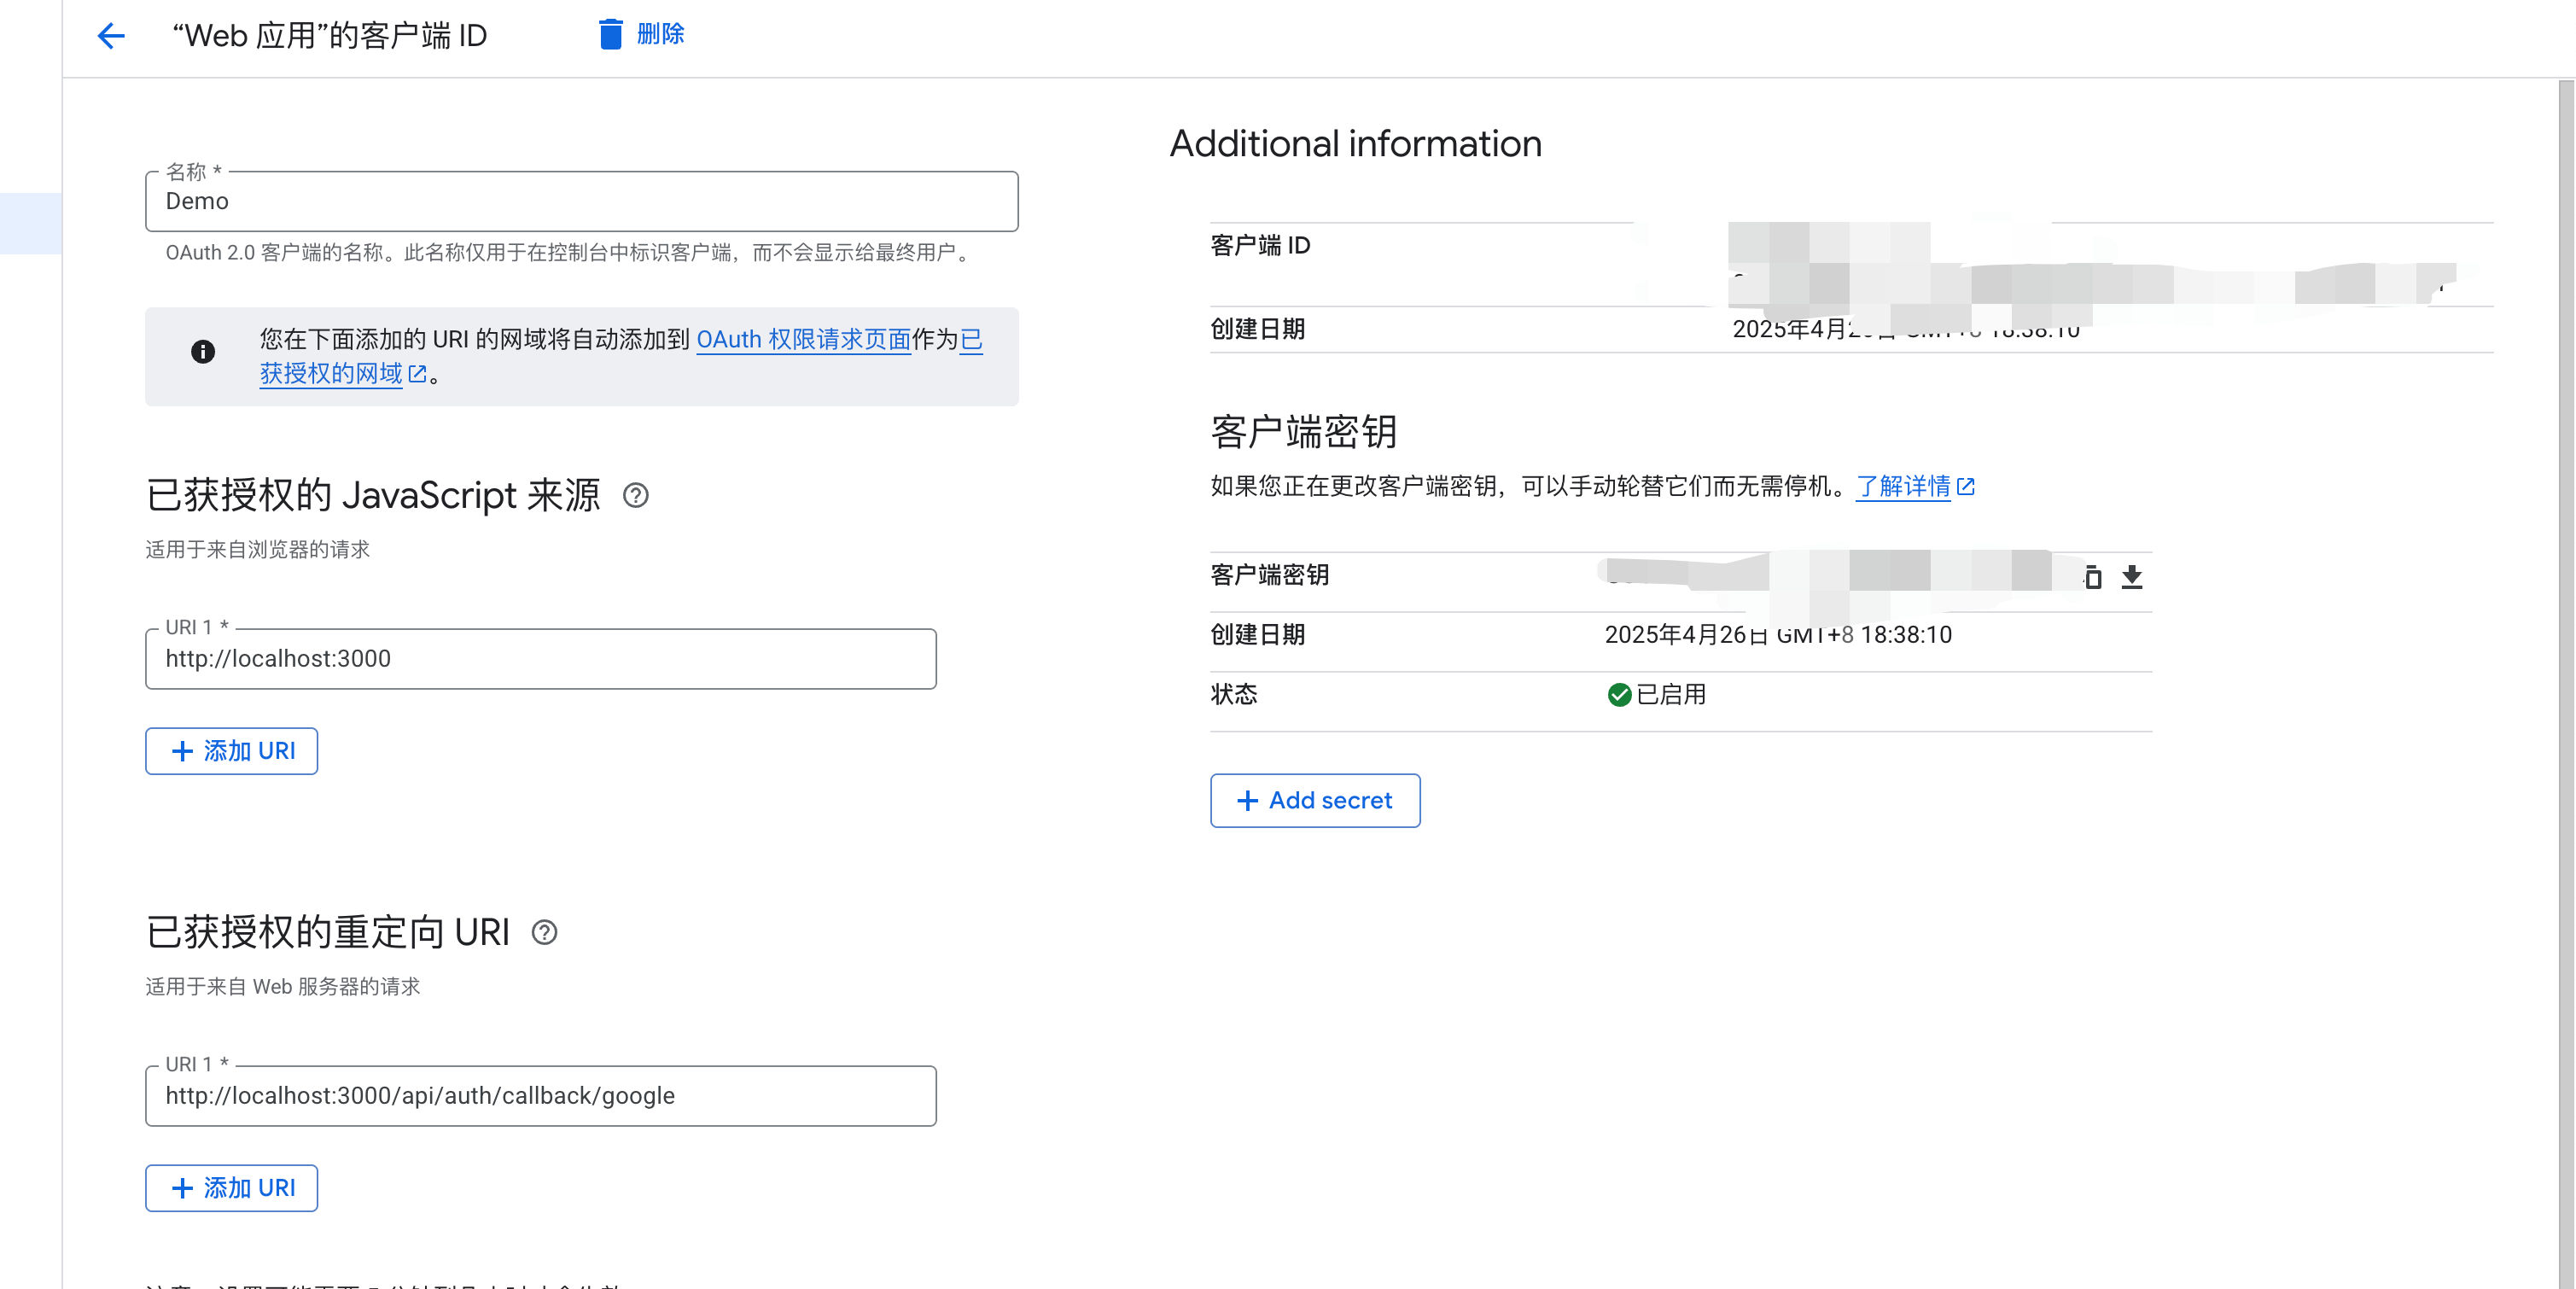
You can see that there will be two secret keys. Fill them in the corresponding fields in the .env file at the mosaic position of the picture. This part is automatically read by the next-auth library and is the conventional naming.
AUTH_GOOGLE_ID=""
AUTH_GOOGLE_SECRET=""
Next is the login part. The relevant files are components/login and app/api/auth/[...nextauth]/route.ts.
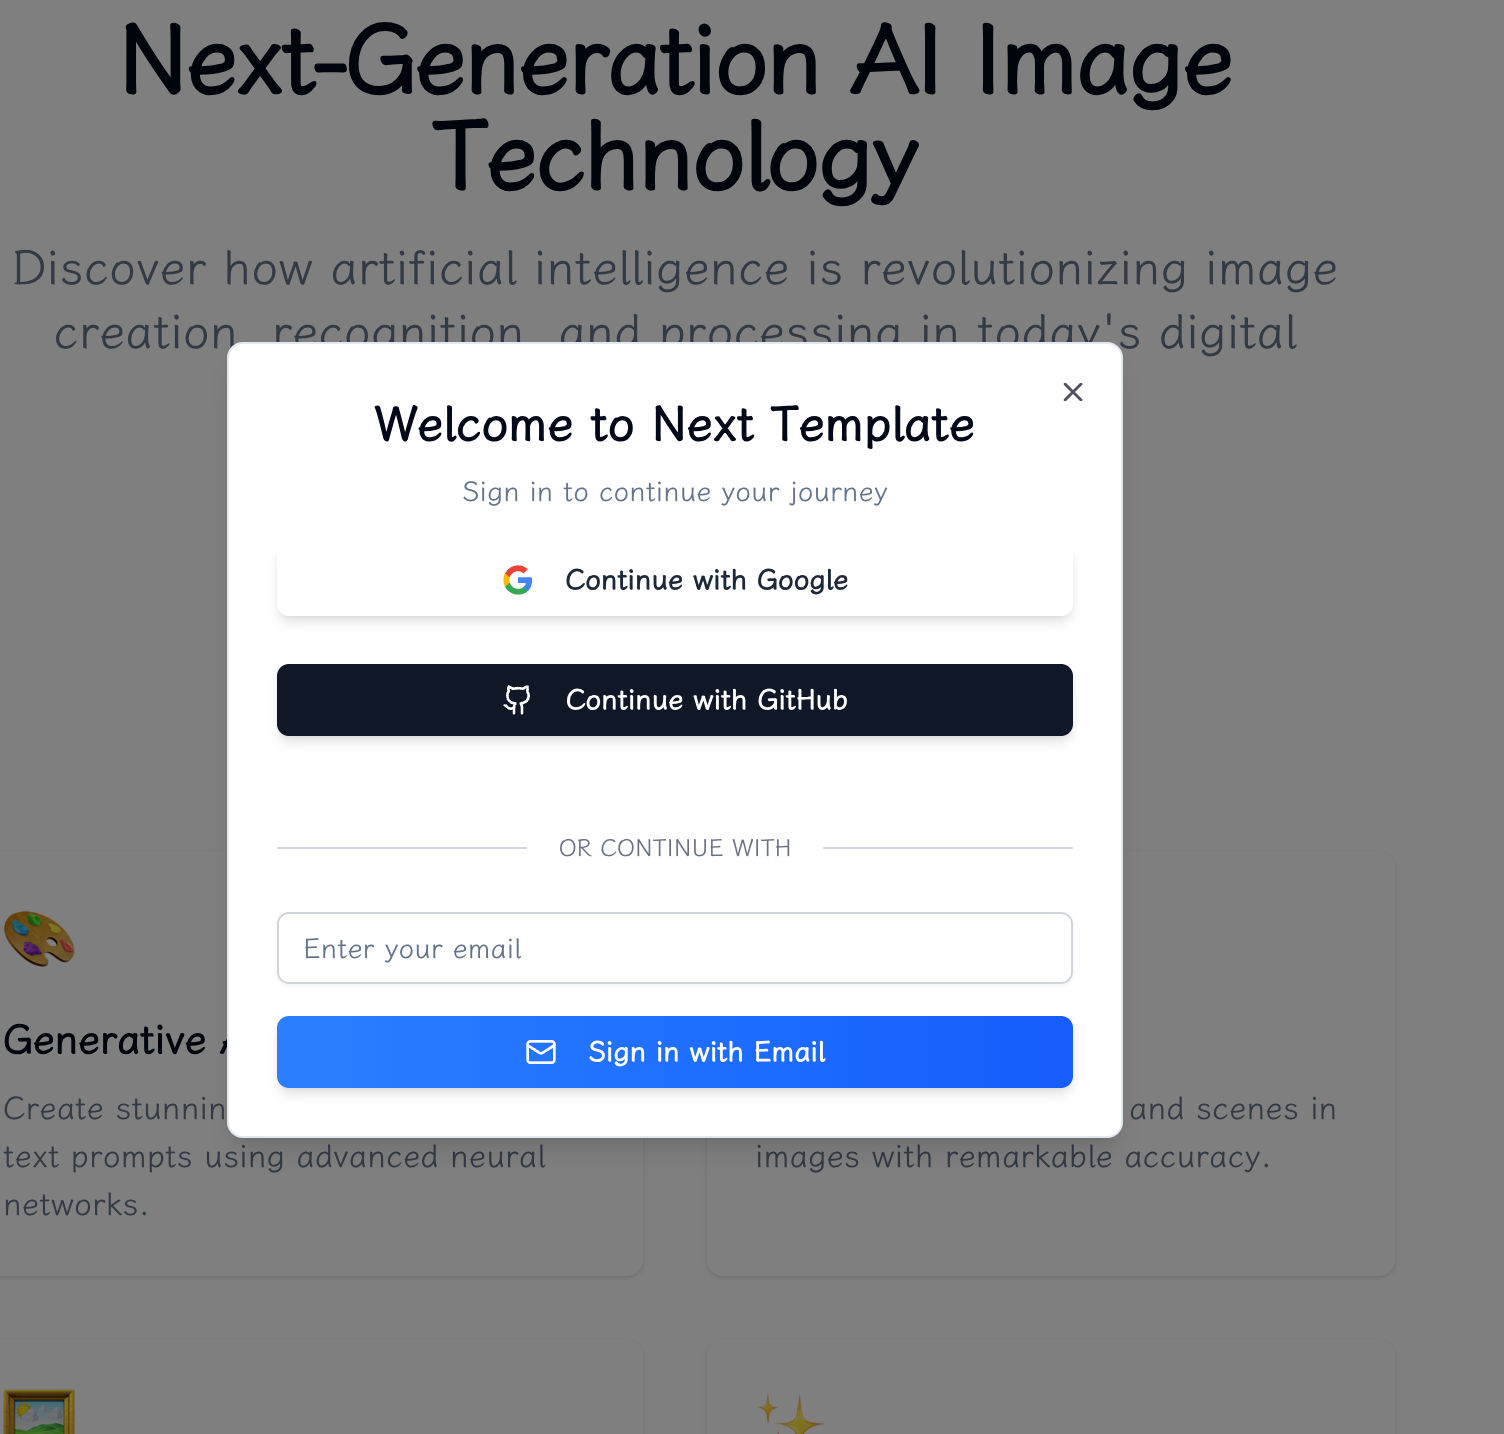
Click to log in and after going through some processes, we can see that there is a Google callback in the console:

This callback is handled by nextauth. [[...nextauth] represents capturing all subsequent routes, and this is the corresponding built-in route provided by NextAuth.
Please refer to documentation directly.
These routes form the core Server API of NextAuth.js, handling authentication, session management, CSRF protection, etc.
This obviously matches the redirect callback address, which represents /api/auth/callback/:provider, which handles Google callback verification parameters.
5. Return to the database
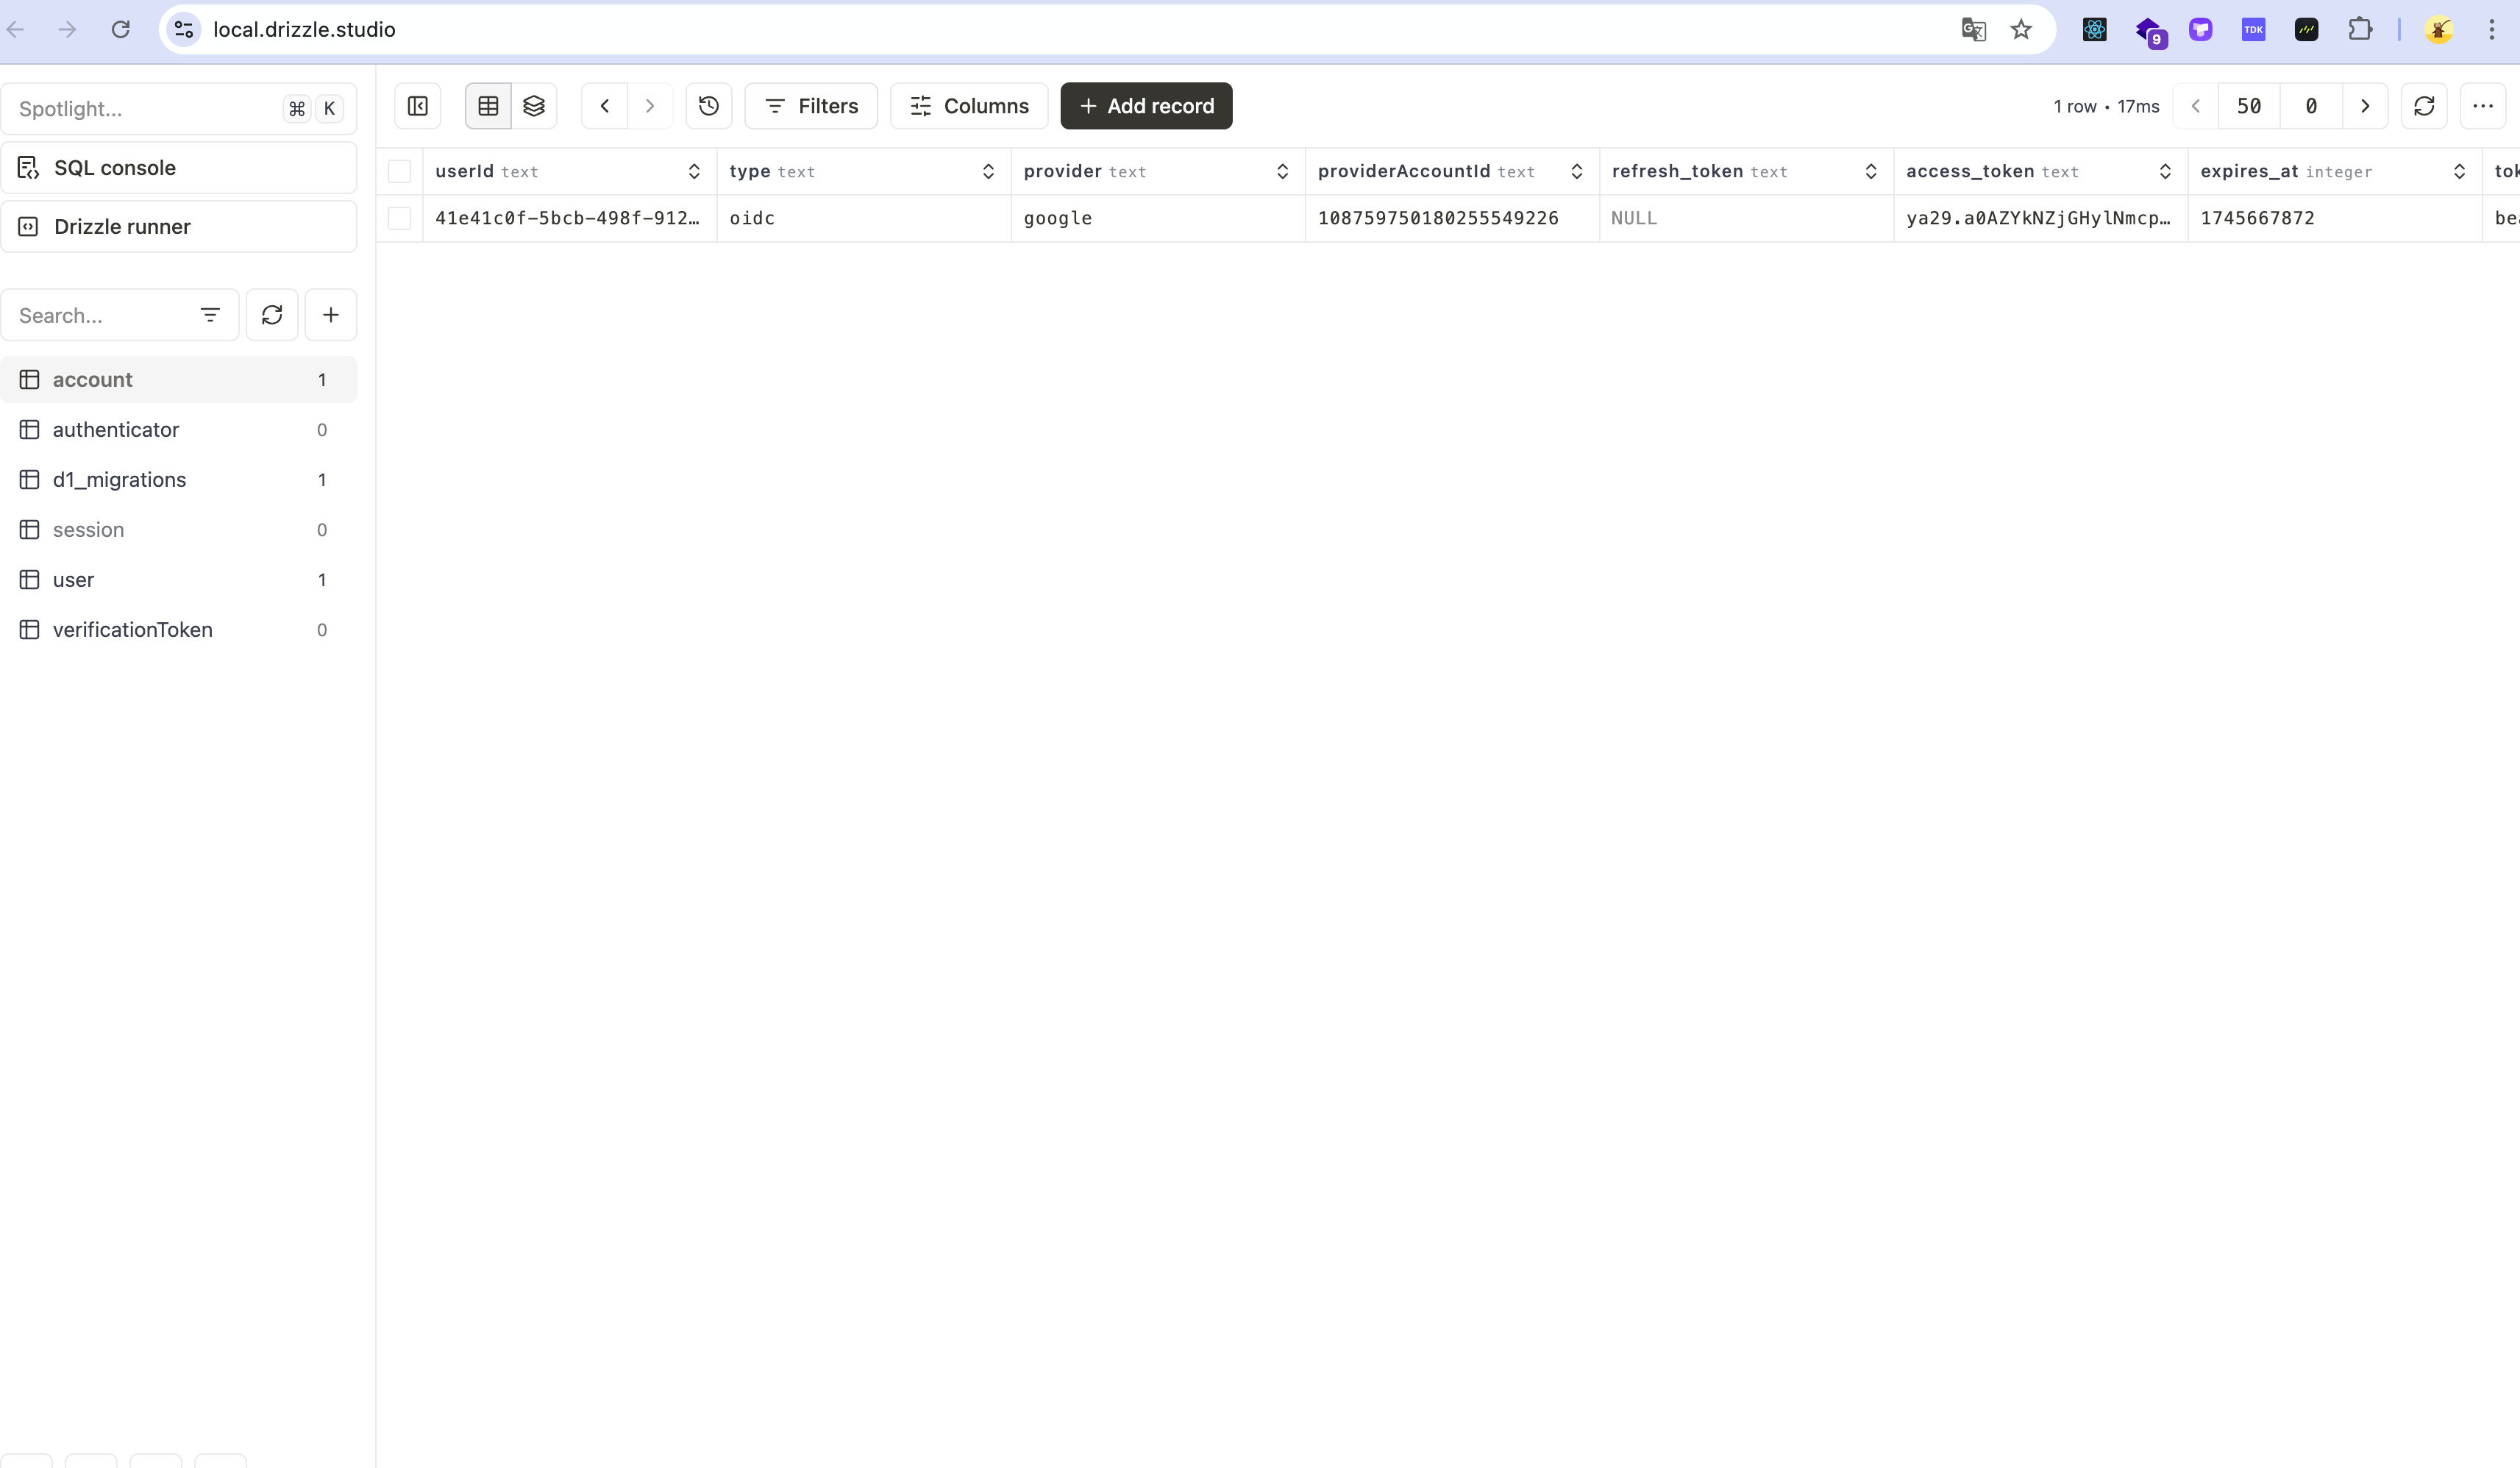
Then when we successfully log in, we can go to the step of checking the database. We use a more friendly GUI method to check the local database.
"db:studio:local": "tsx scripts/db-studio-local.ts", the script in this package.json will execute the db-studio-local script to control the startup of the local/remote database by setting environment variables.
import { execSync } from 'child_process'
import { join } from 'path'
import { existsSync, readdirSync } from 'fs'
import { platform } from 'os'

function findSqliteFile(): string | null {
  const basePath = join('.wrangler', 'state', 'v3', 'd1', 'miniflare-D1DatabaseObject')

  if (!existsSync(basePath)) {
    console.error(`Base path does not exist: ${basePath}`)
    return null
  }

  try {
    function findFile(dir: string): string | null {
      const files = readdirSync(dir, { withFileTypes: true })

      for (const file of files) {
        const path = join(dir, file.name)
        if (file.isDirectory()) {
          const found = findFile(path)
          if (found) return found
        } else if (file.name.endsWith('.sqlite')) {
          return path
        }
      }

      return null
    }

    return findFile(basePath)
  } catch (error) {
    console.error('Error finding SQLite file:', error)
    return null
  }
}

function main() {
  const sqliteFilePath = findSqliteFile()

  if (!sqliteFilePath) {
    console.error('Could not find SQLite database file. Make sure you have run the local database first.')
    process.exit(1)
  }

  console.log(`Found SQLite database at: ${sqliteFilePath}`)

  // Set environment variable and run drizzle-kit studio
  const command =
    platform() === 'win32'
      ? `set "LOCAL_DB_PATH=${sqliteFilePath}" && drizzle-kit studio`
      : `LOCAL_DB_PATH="${sqliteFilePath}" drizzle-kit studio`

  try {
    execSync(command, { stdio: 'inherit' })
  } catch (error) {
    console.error('Failed to run drizzle-kit studio:', error)
    process.exit(1)
  }
}

main()
// drizzle.config.ts
import type { Config } from 'drizzle-kit'

const { LOCAL_DB_PATH, DATABASE_ID, CLOUDFLARE_API_TOKEN, CLOUDFLARE_ACCOUNT_ID } = process.env

// Use better-sqlite driver for local development
export default LOCAL_DB_PATH
  ? ({
      schema: './lib/db/schema.ts',
      dialect: 'sqlite',
      dbCredentials: {
        url: LOCAL_DB_PATH
      }
    } satisfies Config)
  : ({
      schema: './lib/db/schema.ts',
      out: './migrations',
      dialect: 'sqlite',
      driver: 'd1-http',
      dbCredentials: {
        databaseId: DATABASE_ID!,
        token: CLOUDFLARE_API_TOKEN!,
        accountId: CLOUDFLARE_ACCOUNT_ID!
      }
    } satisfies Config)
You can see that the data has been successfully inserted.
So actually this is not enough. We need to find the data in the code and verify whether the ORM is available.
// actions/test.ts
'use server'

import { createDb } from '@/lib/db'
import { users } from '@/lib/db/schema'

export async function getUsersTest() {
  const db = createDb()
  const data = await db.select().from(users)
  return data
}

export async function getTableSchemas() {
  const db = createDb()

  const tables = await db.run(`SELECT name FROM sqlite_master WHERE type='table' AND name NOT LIKE 'sqlite_%'`)

  return tables
}
Here is a server actions file (a file that directly obtains data). There are two mainstream ways to handle data requests in Next.js:
-
Route Handlers: In App Router, by exporting functions with the same names as HTTP methods (GET, POST, PUT, etc.), Next.js will automatically map these functions to the corresponding API endpoints.
// app/api/users/route.ts export async function GET() { const users = await fetchUsers() return Response.json(users) } -
Server Actions: Allows you to define server-side functions directly in components or modules and call them directly from the client without creating API routes.
// actions/users.ts
'use server'

export async function getUsers() {
  const users = await fetchUsers()
  return users
}
Server Actions provide a more direct way to obtain data and reduce the boilerplate code of API routing.
In the development of full-stack applications, it is necessary to use
Route Handlersonly for routes that require external calls.
We can call the function directly to make the request
'use client'

import { getTableSchemas, getUsersTest } from '@/actions/test'
import { Button } from '@/components/ui/button'

export const TextButton = () => {
  return (
    <Button
      onClick={async () => {
        const data = await getTableSchemas()
        const users = await getUsersTest()
        console.log('Data:', users, data)
      }}
    >
      Test
    </Button>
  )
}
The result is as follows:

End
So here, we have actually run the project and the local database, so in the next chapter we will directly start the deployment of the remote project.