12. 上传Cloudflare的R2桶
这是预览内容
非会员仅可阅读 30% 的正文。
在我们的开发中,会有各种的图片资源或者文件资源需要一个地方存储,而在 Cloudflare 中是通过 R2 去实现资源的存储。
市面上有各种的桶的选择(例如S3)、但Cloudflare 10个G(500KB一张图,2W张图)、100万次增删改资源、1000万次读资源的免费额度,还是显得非常的夸张(这真的很多)。
虽然是免费的,但要开通R2桶需要有一张信用卡或者虚拟信用卡,关于开卡后面单写一章。
配置R2存储桶
首先执行pnpm wrangler r2 bucket create static,会创建一个Static桶,将其配置复制到 wrangler.jsonc 中,再跑 pnpm cf-typegen 生成R2的类型。
"r2_buckets": [
    {
        "bucket_name": "demo",
        "binding": "NEXT_INC_CACHE_R2_BUCKET"
    },
    {
        "bucket_name": "static",
        "binding": "static"
    }
],
紧接着在Cloudflare的官网上配置一下static的域,以购买的域名任意子域名即可。
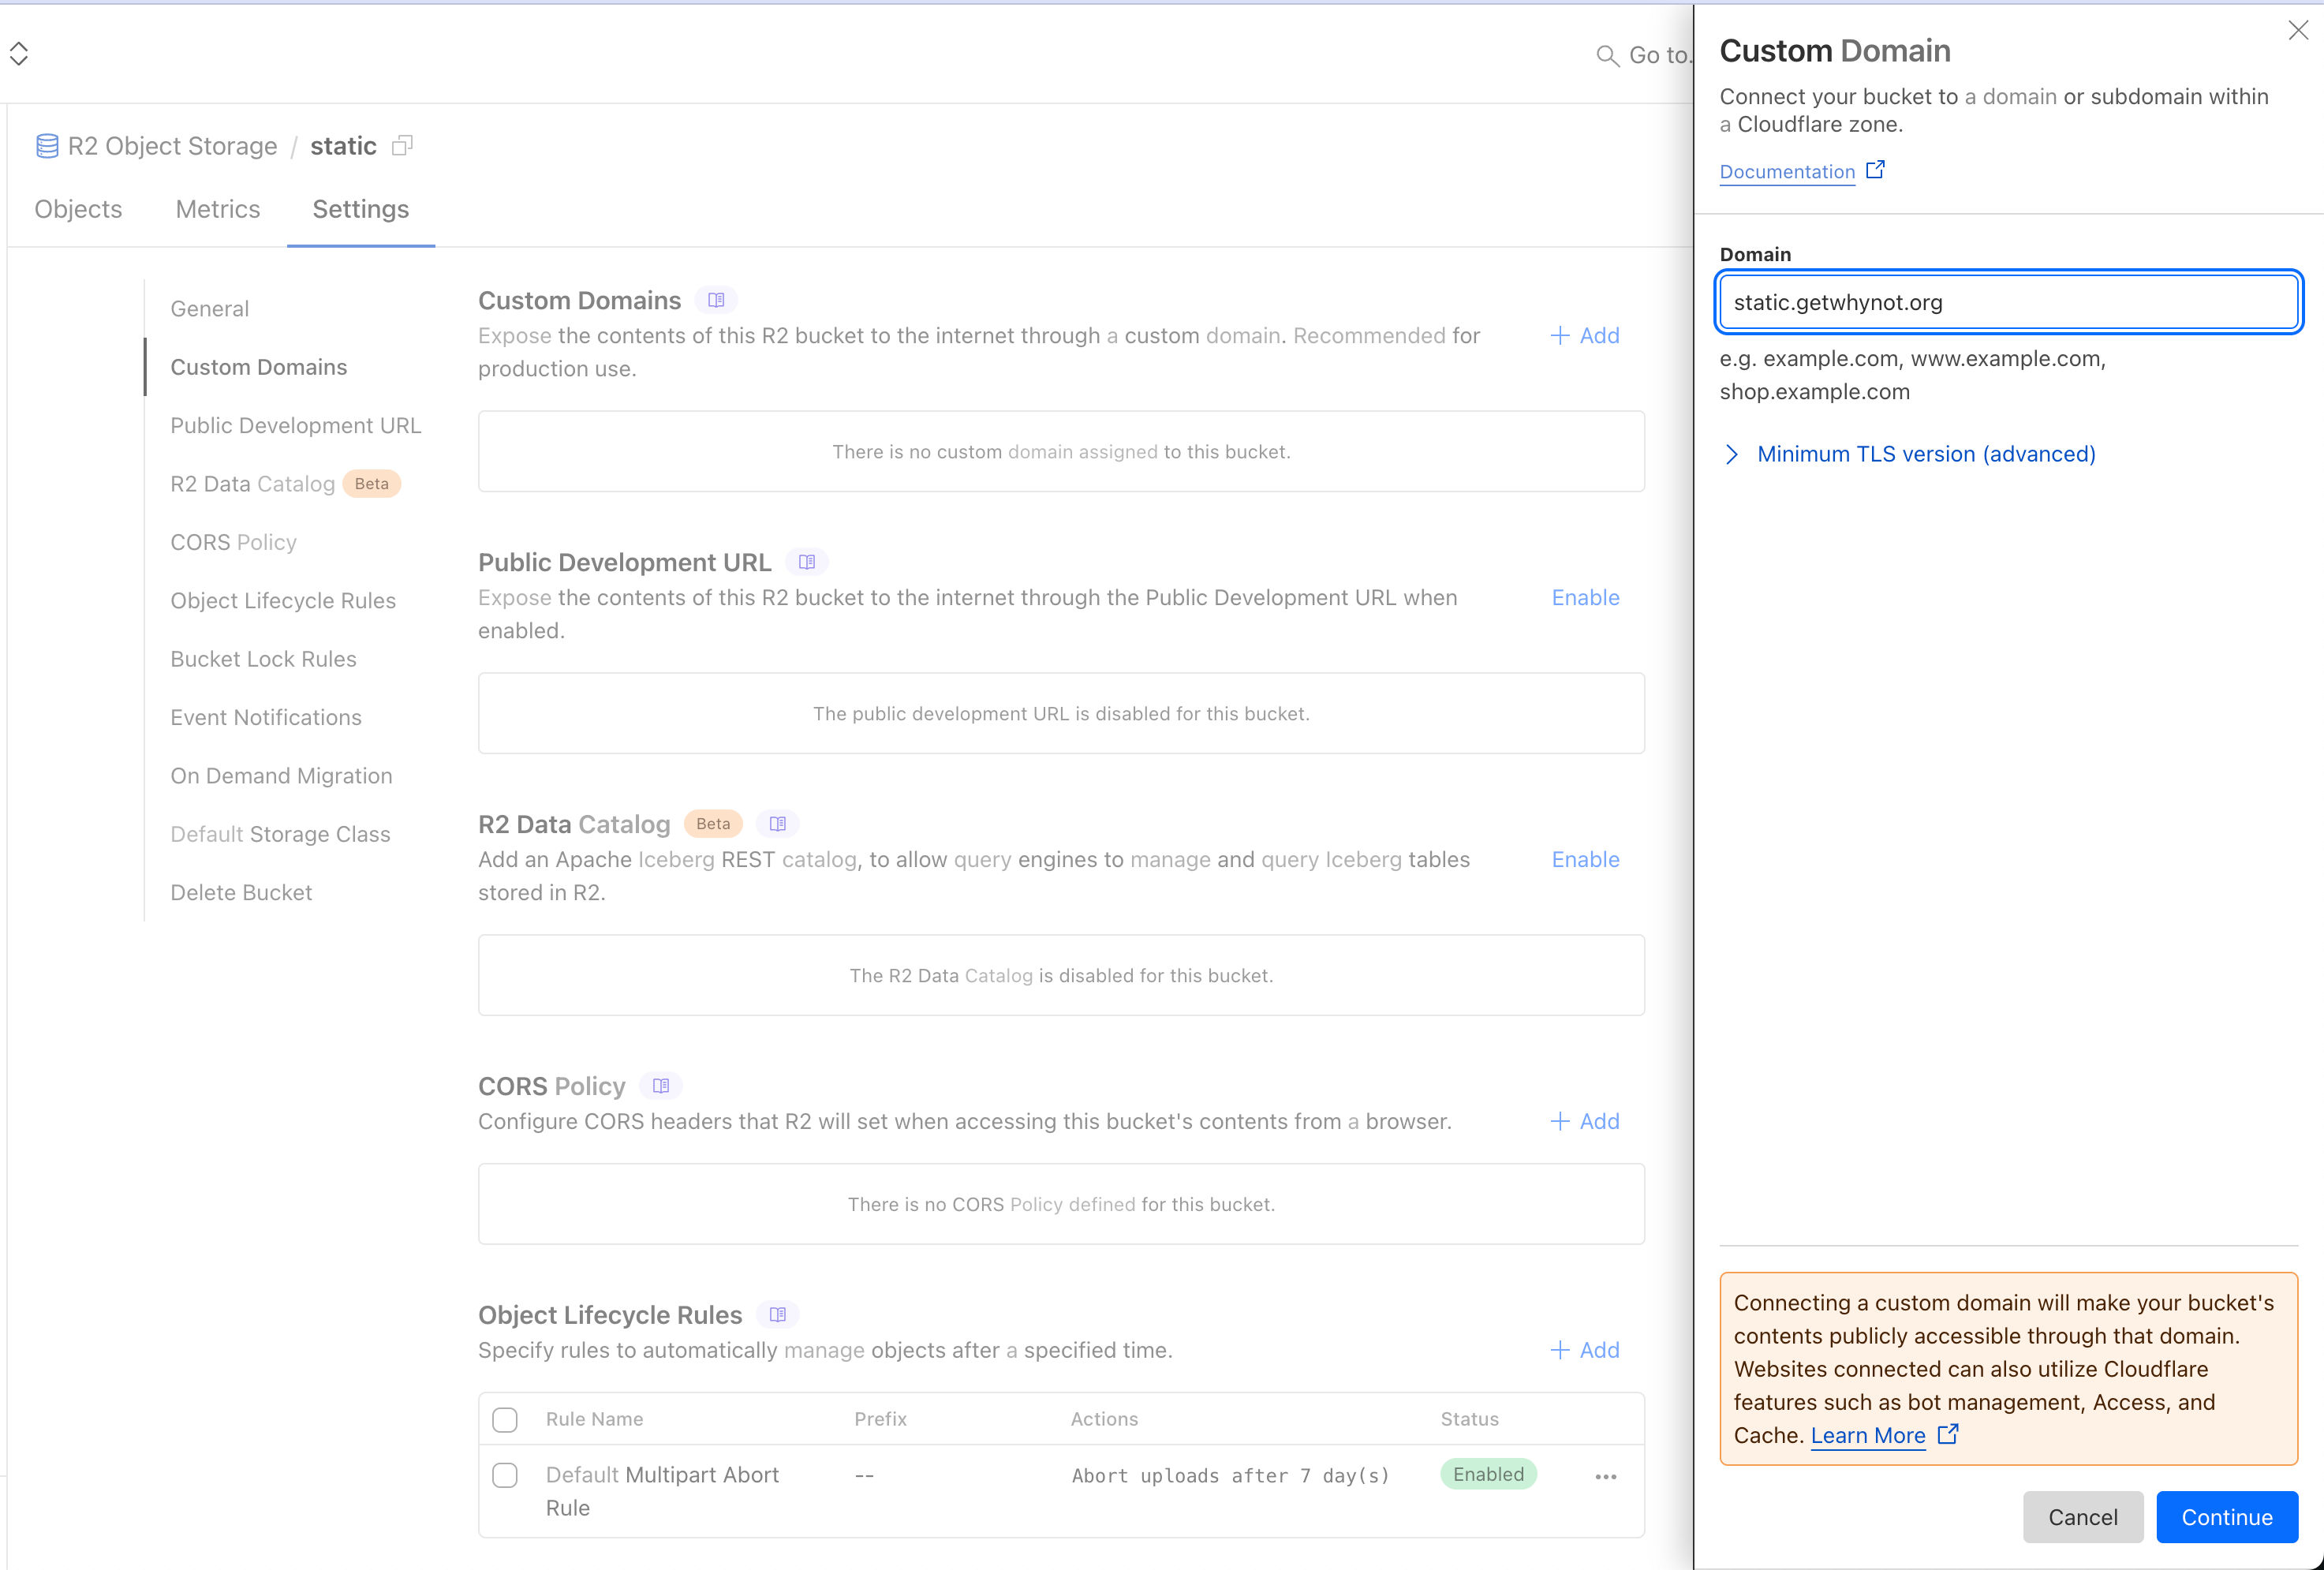
这是完成后的,设置面板的样子
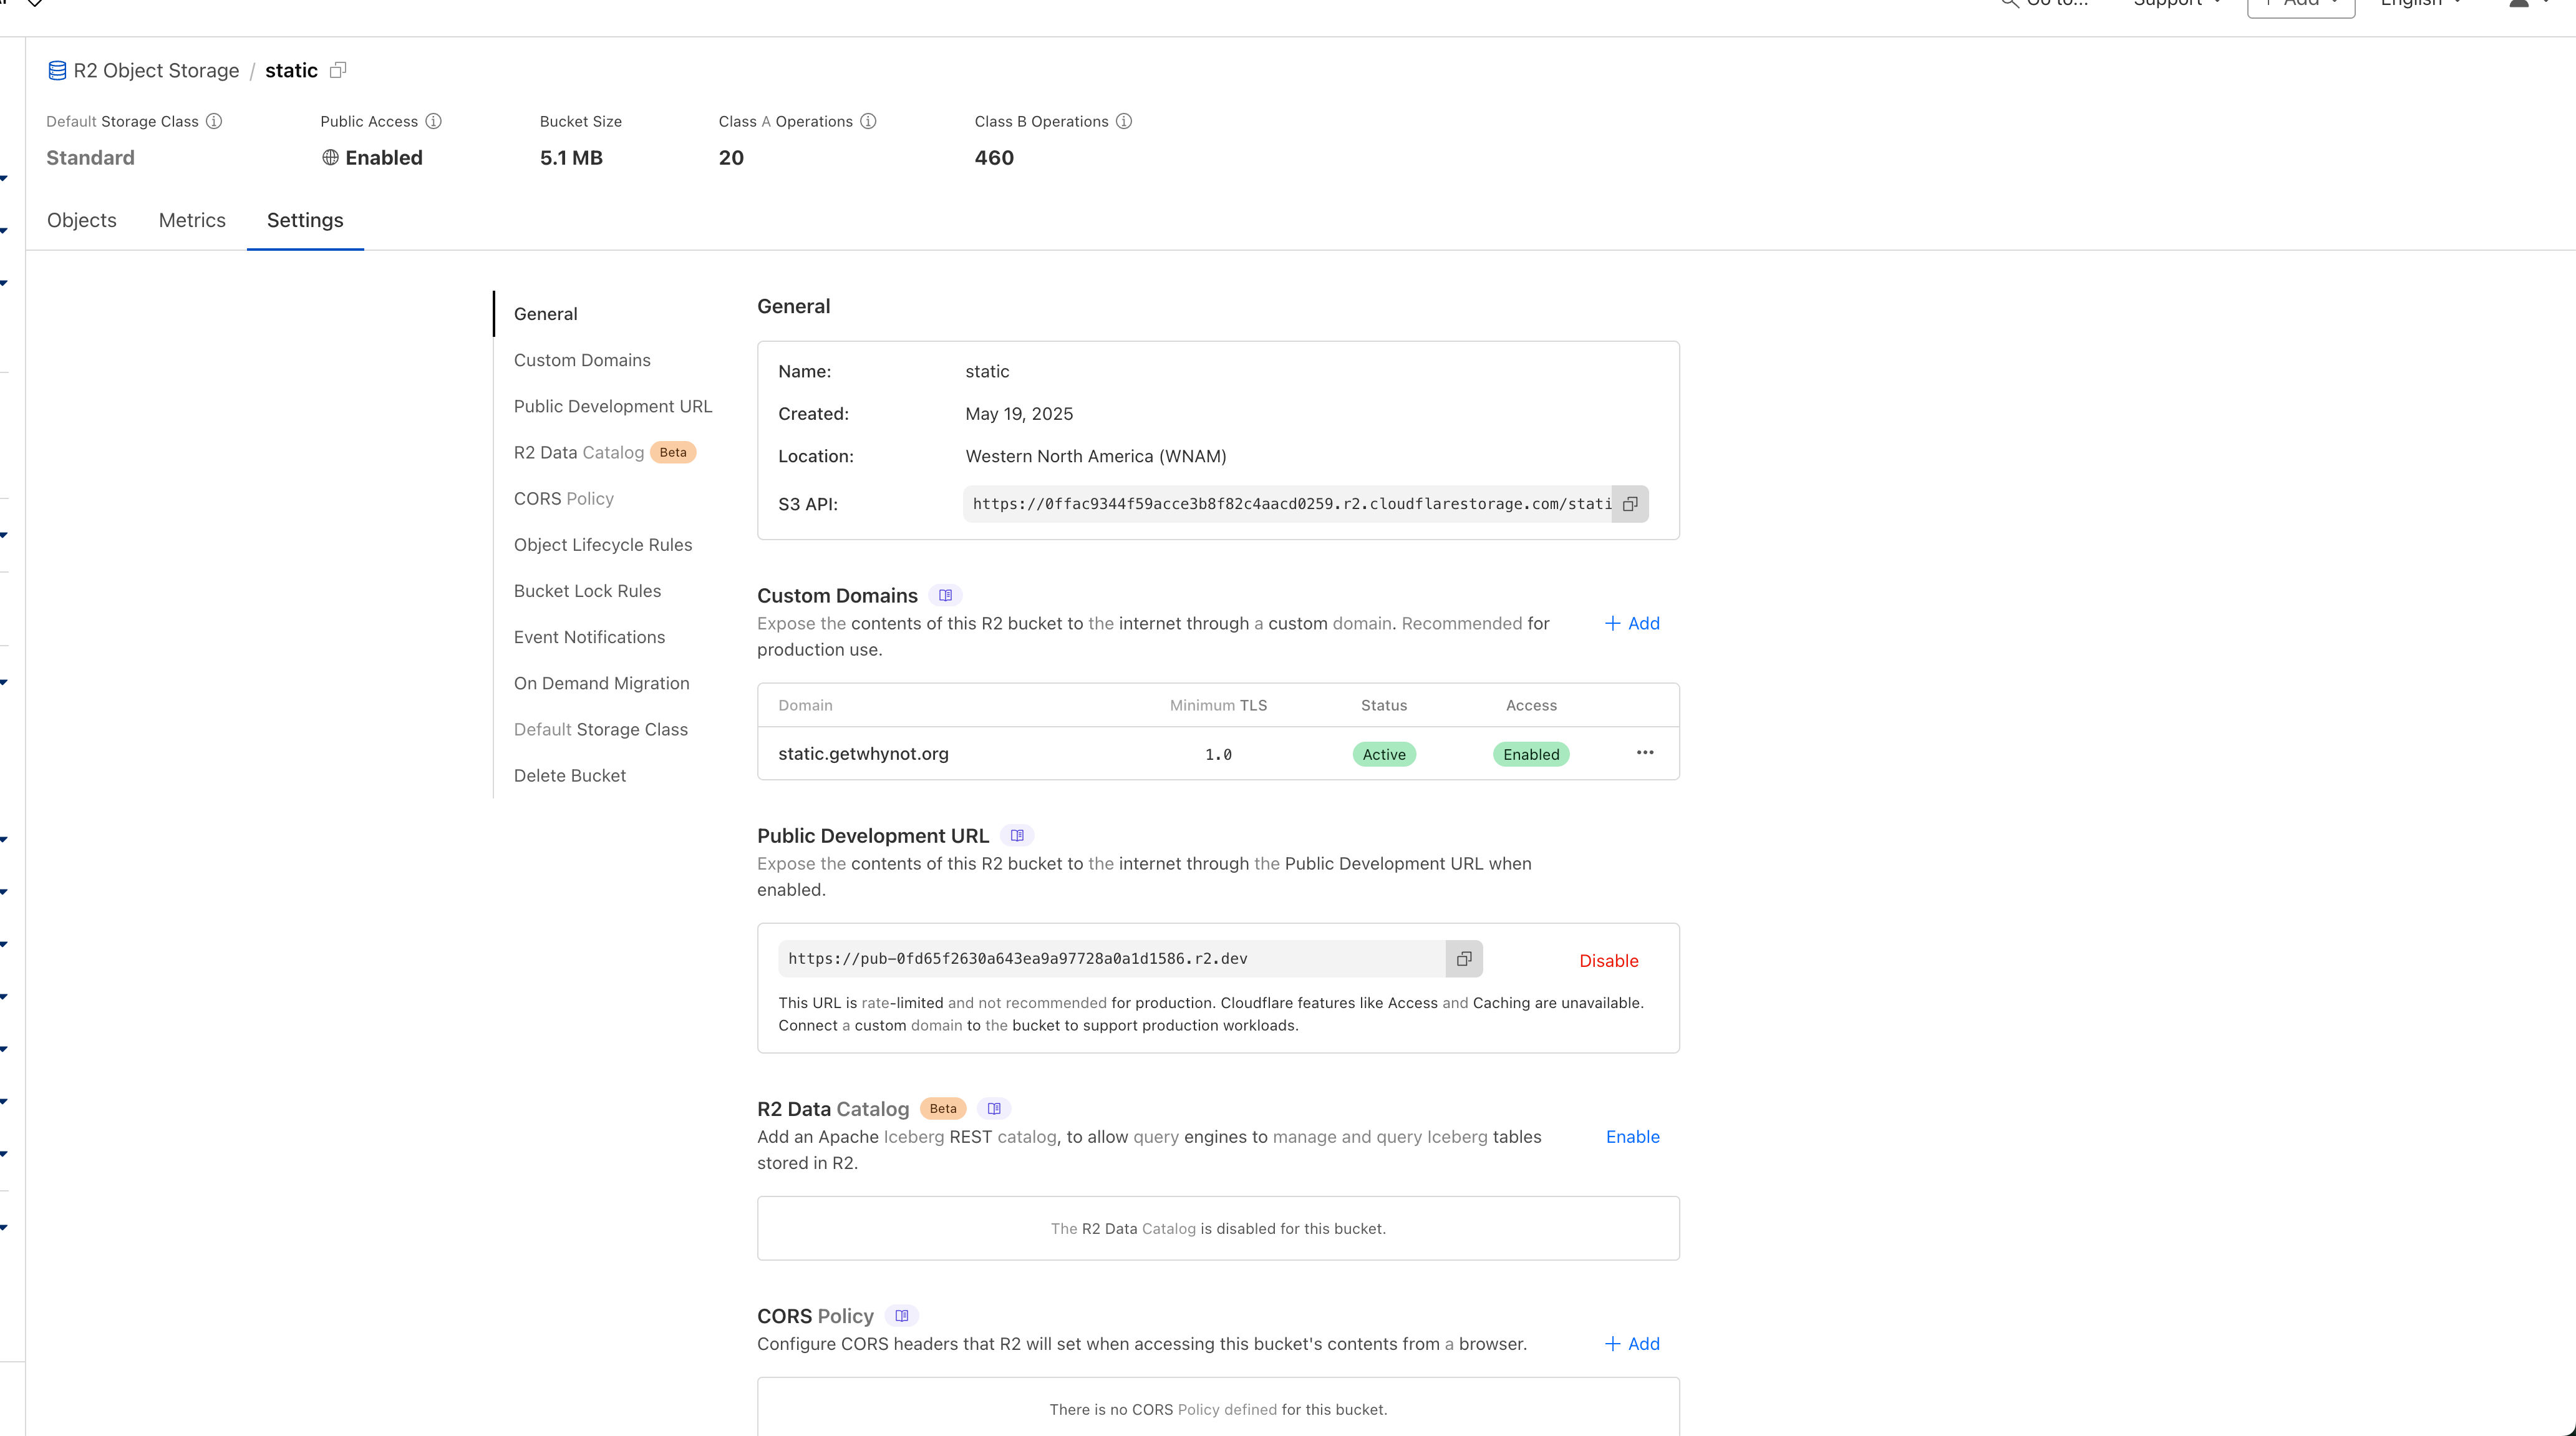
紧接着传一张图片在桶的最外面,测试是否可以访问,前面是你的子域后面是你的文件名(加文件夹就多一个/),比如这样:
https://static.getwhynot.org/2024-04-19_6623010998e48_lara-lightland.png
合理的文件夹和文件的命名方式,可以防止撞文件。
在代码中实现上传功能
其实在上面一步,我们就直接拥有自己的图床了,但我们在有的场景里面需要存储用户的图片、或者模型返回的图片,所以就给大家写一下这个通用逻辑。
创建R2的功能函数,在lib/r2.ts
import { getCloudflareContext } from '@opennextjs/cloudflare'

export const createR2 = () => getCloudflareContext().env.static
实现Base64转二进制流上传的功能,在actions/ai.ts
'use server'

import { createAI } from '@/lib/ai'
import { createR2 } from '@/lib/r2'

export async function cloudflareTextToImage(prompt: string) {
  try {
    const ai = createAI()
    const r2 = createR2()

    const response = await ai.run('@cf/black-forest-labs/flux-1-schnell', {
      prompt: prompt
    })

    if (!response.image) {
      throw new Error('No image was generated by the AI model')
    }

    const base64Image = response.image.startsWith('data:image/')
      ? response.image
      : `data:image/png;base64,${response.image}`

    const imageBuffer = new Uint8Array(Buffer.from(response.image, 'base64'))

    const sanitizedPrompt = prompt.replace(/[^a-zA-Z0-9]/g, '-').substring(0, 30)
    const filename = `${Date.now()}-${sanitizedPrompt}.png`

    try {
      await r2.put(filename, imageBuffer, {
        httpMetadata: {
          contentType: 'image/png'
        }
      })
    } catch (r2Error) {
      console.error('Error storing image in R2:', r2Error)
    }

    return {
      success: true,
      imageData: base64Image,
      imageUrl: filename,
      error: null
    }
  } catch (error) {
    console.error('Error generating image:', error)
    return {
      success: false,
      imageData: null,
      imageUrl: null,
      error: error instanceof Error ? error.message : 'Unknown error occurred'
    }
  }
}
会员专享
订阅后解锁完整文章
支持创作、解锁全文,未来更新也会第一时间送达。
评论
加入讨论
登录后评论
还没有评论,来占个沙发吧。